

This article will be broken down into five sections. This is Part 1:
- Image Storage
- Focus and Exposure Verification
- Through the Lens (TTL) Picture Framing and Eyepieces vs. LCD Displays
- Manual Focusing
- Exposure Metering Control
- Exposure Modes
Digital cameras allow today’s amateur aquarist to take wonderful pictures of their tanks, but obtaining optimal results requires some care and understanding. In this series of articles, we will discuss desirable camera features, camera use techniques, and even a few digital post-processing techniques. If you already have a digital camera, you will learn how to use the camera most effectively; if you are considering purchasing a digital camera, you will learn which features are important to the amateur aquarist, and why.
The best way to buy a camera is to find a way to borrow one, so that you can see how the camera works, and determine whether it feels comfortable to you. No camera store will lend you a new camera, although some do have no- questions-asked return policies. Ask around: you may have a friend who will loan you a camera for an afternoon.
I wrote my own image viewing program (JLB Image, for Windows) when I became frustrated with those that were available commercially. As I needed features, I added them, so the result is half an image viewer and half an image editor. You can download from http://www.bivio.com/jon_bondy/files/HomePage/software.html if you wish. I will be using it in the examples that follow. There are many other image processing programs, but they are often much more complex to use than my software, which was designed for simplicity. In situations where I cannot use JLB Image, I use Picture Window, created by Digital Light and Color at http://www.dl-c.com.
Image Storage
Most cameras store images on internal memory chips (some use diskettes or write-once mini CDs). The cameras come with the smallest chips available, usually 8 MB or 16 MB. Such chips are essentially useless, since they will only hold about 10 images, so you will want to buy a larger memory chip. I usually buy the largest ones available, currently around 128 MB. These chips will cost an additional $100 or so, and while they are not essential, they will make your life a bit easier. You will be able to get between 50 and 300 images on such a chip, depending on the size and quality (compression) of the images you take.
Most cameras allow you to take pictures in a variety of “resolutions”, ranging from a low of 640 x 480 pixels up to perhaps 2560 x 1920. The larger the image is, the more memory it will consume in the camera. There is a tradeoff between taking huge pictures vs. being able to store large numbers of pictures in the camera. You should carefully consider how you intend to use your images before you take them, so that you do not take images that are either too large or too small for your intended use. For example, if you want to use a picture as “wallpaper” on your computer desktop, there is no need to take a picture that is much larger than, say, 1200 x 1600, or perhaps even 1024×768. If you want to print an 8×10, or larger, you should shoot the largest image your camera can obtain. And if you are taking pictures for use on a web site, you may not need to take anything larger than perhaps 1024×768, since larger images take “too long” to
download by modem. When in doubt, take larger images, rather than smaller.
Most cameras store images in JPG format. This format is a “lossy” format, where you can never recover the original image exactly. There are “lossless” formats, such as GIF, TIFF, and BMP, but they result in huge image files, often 10 or 20 times larger than the corresponding JPG image. Many cameras will allow you to take lossless images in a format such as TIFF. My experience is that the difference between the TIFF and the JPG is almost impossible to see with the naked eye. I would recommend that you use JPG images unless you can convince yourself that the higher quality TIFF images are important to you.
JPG images are not compressed in a fixed manner: you can compress the images more to reduce storage space, at the expense of image quality. Most cameras will allow you to specify the image quality, which corresponds to the amount of compression and the image sizes in the camera. You should play with different image quality settings to see which setting is best for you. Often the highest quality setting results in huge images that offer only marginally better image quality than images of theoretically lower quality.
Focus and Exposure Verification
Digital cameras allow you to verify that you have taken a good picture immediately after you press the shutter button. All good cameras provide some degree of image playback, but this is complicated by the fact that while camera resolution keeps going up, the resolution of the on-camera displays has not increased. This means that verifying correct focus using the on-camera display requires that the camera can zoom the image during playback. Some cameras provide only one level of playback zoom, while others allow you to dive deeply into the picture. The former is often inadequate, and results in your realizing that the focus was off only after you return to your computer.
Focusing errors can occur for a variety of reasons. Sometimes you attempt to take a picture of a subject that is too close for the camera to correctly focus on. This may be obvious if you are focusing manually, but you may not be aware of this if the camera is auto-focusing. Since minimum focus distance often varies depending on camera zoom setting, you can even have a focusing error while taking a picture of a subject that you have photographed before if you accidentally zoom while trying to take a close-up picture. Even when the subject is at an adequate distance from the camera, cameras often auto-focus on subjects other than the subject you are interested in. The only way to deal with this is by inspecting the picture immediately after you take it.
Remember that “film” is now essentially free, so shoot lots of pictures, and be willing to toss most of them away. This is one wonderful feature of digital cameras when compared to film cameras. With film cameras, by the time you got the prints back, you couldn’t recall what had caused your pictures to fail. Now, you can inspect each picture as you take it, to see if you are improving.
Through the Lens (TTL) Picture Framing and Eyepieces vs. LCD Displays
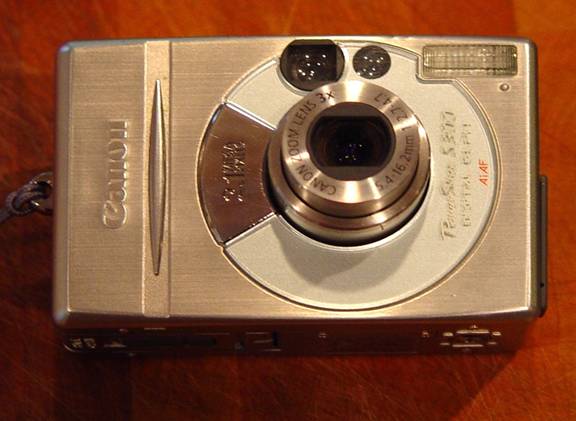
Some cameras allow you to view the image “through the lens”, on a small display either on the back of the camera, or through an eyepiece. Others only let you frame the image using a separate optical system (as was done with “range finder” cameras in the past). Cameras with separate viewfinder optics can be discerned by viewing the camera from the front: if there is a glass lens above the main lens, then you probably will not be viewing the image TTL.
In the example camera, below, the camera lens is in the center of the concentric circles. There are three other lenses above the main lens. The lens on the left is the front of the viewfinder optical system: this is what you use to frame the picture with this camera, and this is how you can tell that this camera is not TTL. The middle lens is used to illuminate the subject in the dark, so that this camera can take good pictures in low light situations. The glass on the right is actually the flash.
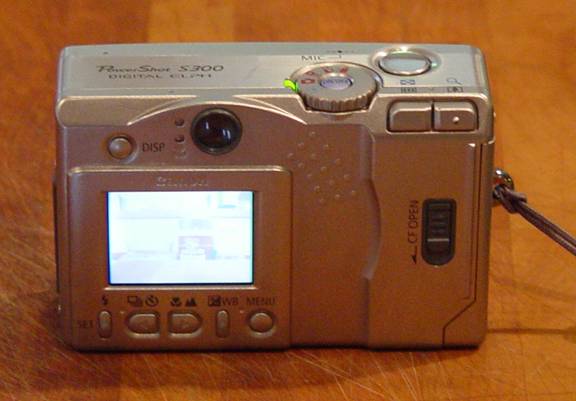
Unfortunately, things are note quite as simple as this. Many cameras offer both TTL and non-TTL modes, and the Canon camera, above, is one of them. When you use the eyepiece, you are using the non-TTL viewfinder and optical system, but the camera also has a small (1” x 1.25”) LCD screen on the back, and when you use this screen for framing the picture, you are using a TTL camera. Here is the camera from the back; the LCD screen is the bright rectangle on the left; the optical viewfinder is the black lens above it.
Most of us are used to film cameras with an eyepiece, so use of an LCD screen for focusing seems awkward at first. Unfortunately, it remains awkward even after you spend some time practicing with it. Holding the camera out in front of you feels less natural than keeping it close to your body, right in front of your face. Using LCDs in the sunlight is difficult, since the sunlight washes the LCD image out. And, for those of us who now need reading glasses, looking back and forth between the LCD screen and the actual scene can be difficult. Finally, if you ever want to use your camera to take action photos (such as pictures of your friends or kids playing soccer or baseball), use of an eyepiece is essential. You will not be able to frame pictures rapidly using the LCD screen.
Using a TTL camera is critical for tank photography for a variety of reasons, as described below. Accurate manual focusing and optimal manual exposures can only be obtained using a TTL camera.
Manual Focusing
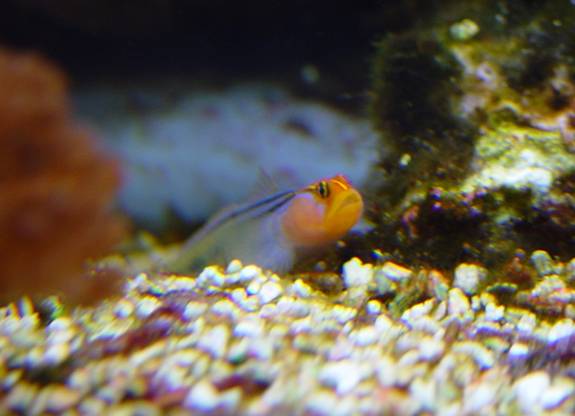
Photographing images through a sheet of glass makes the camera’s job of auto- focusing more difficult than normal. It is not unusual for auto focusing to fail under these circumstances, so having a manual focusing option is important. This is one reason why you want a TTL camera: you want to be able to focus precisely on the object that is of interest to you, rather than trusting the camera to do this for you. In a complex scene, with many foreground and background objects, manual focusing can be very important. Imagine how the camera would react to trying to focus on this scene (which was focused manually):
As camera resolutions have increased, determining optimal manual focus through a digital display can be more and more difficult. Many cameras now automatically, and temporarily, zoom in while the camera is being focused manually. This allows you to set the focus correctly, but it can be a bit disconcerting to see the image jumping back and forth between magnifications.
Some cameras allow you to focus manually by using a traditional focusing ring around the lens barrel; others allow you to focus using various buttons. Choose the camera with the controls that are most comfortable to you.
Exposure Metering Control
Film cameras went to a lot of work to estimate the correct exposure for the film that was in the camera. Digital cameras benefit from having a “smart” sensor that can tell the camera when it is experiencing over-exposure or under-exposure. Even better, you can watch the exposure on the TTL viewer, and see whether the exposure is correct before you take the picture. And, finally, you can inspect the picture immediately after taking the picture, to be sure that the image is as expected.
The big question with exposure has to do with how the camera uses the data that the sensor is acquiring. The camera takes all or some part of the sensor data and tries to adjust the exposure (shutter speed and lens aperture) so that the resulting light level is right in the middle between white and black. That is, the camera tries to make the light level “gray”. When the camera takes all of the incoming scene into consideration, this is termed full frame metering.
When you take a picture with full frame metering where the lighting is even, this is a great approach, but it can fail where some of the picture is very dark and/or some is very bright. Imagine trying to take a picture with lots of bright white substrate in it: if the camera tries to make the substrate gray, the image will be under exposed.
Full frame metering can also fail if the subject of interest just happens to be either brighter or darker than the majority of the image. In order to deal with these situations, many cameras offer “center weighted” metering (in which the central ¼ or so of the image is used for exposure estimation) or “spot” metering (in which a tiny spot in the center of the image is used for exposure estimation). These exposure metering modes allow you to point the camera at the object of interest and obtain an exposure that is correct for that object, even if it is not correct for the overall image taken as a whole. They will also help you take better pictures if you photograph friends with a bright background (back lighting).
I use spot metering all of the time. The basic technique is obvious: you point the central spot at the object of interest. A more interesting approach is slightly more complex.
If you aim your camera (with spot metering enabled) at a scene with complex lighting and slowly move the central spot between a dark area and a bright area, you will notice that as the camera adjusts the exposure to optimize the image under the spot, the rest of the image gets brighter and darker. You can then carefully move the spot around until you see an exposure that seems optimal to you. With most cameras, if you then partly depress the shutter button, the camera will compute the correct focus and exposure for the scene (at that instant) and then lock those values until you either press the button all the way down (and take the picture) or release the button. With the button partly depressed, you can then re-compose the picture and take it with the exposure that you desire.
A word about the images you are about to see. I will be showing you two kinds of images: “full frame” and “full resolution”. The “full frame” images show you the entire picture that the camera took, but reduced in size, so as to make the image small enough to be downloaded in a reasonable time. The original pictures may have been 2500 x 1900 pixels, but I show them here at about 800 x 600 pixels. I usually show full frame pictures so that you can understand the composition of a picture, or its exposure.
The “full resolution” images show you a small part of the original picture, at the original resolution, but cropped down to roughly 800 x 600 to allow downloading. I usually show full resolution images so that you can appreciate some details in the picture.
Here are three identical full frame images that were taken with full frame metering, center weighted metering, and spot metering:
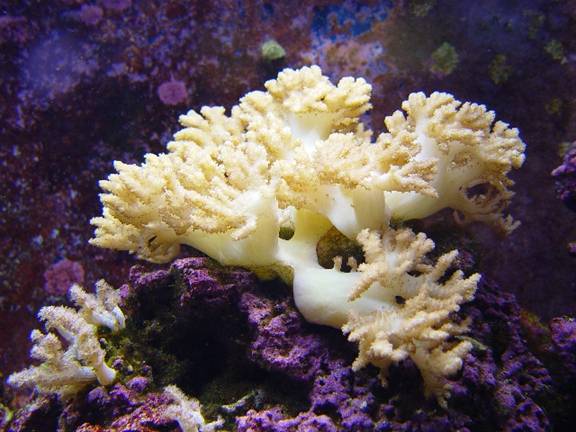

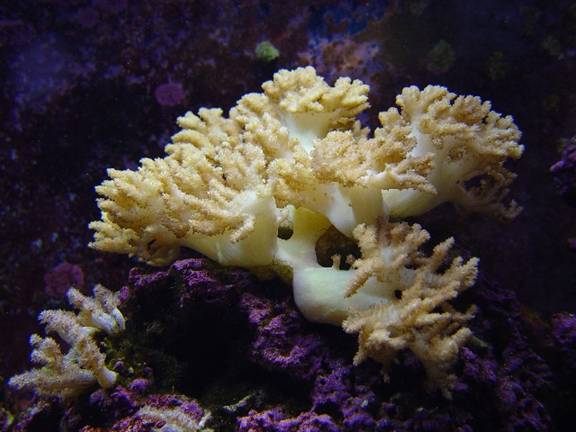
The first image has a nicely exposed background, but the coral is over exposed. This is because the camera tried to optimize exposure for the whole scene, and with a large brightness difference between the coral and the background, the camera was unable to optimize either.
The second and third images have better exposures for the coral, since, in this scene, the coral fills the center of the image. Of course, this exposure comes at the expense of the exposure for the background.
Use of the spot-metering mode allows you to select the exposure that seems best to you. The trick is to locate a part of the scene which has high contrast, and then slowly move the center of the scene from the darkest location to the brightest (or vice versa). You will see a series of different exposures presented to you, as the spot meter moves from dark to light. By choosing a location which results in the optimal exposure, you can take the exact picture that you want, the picture that emphasizes the subject that you’re interested in.
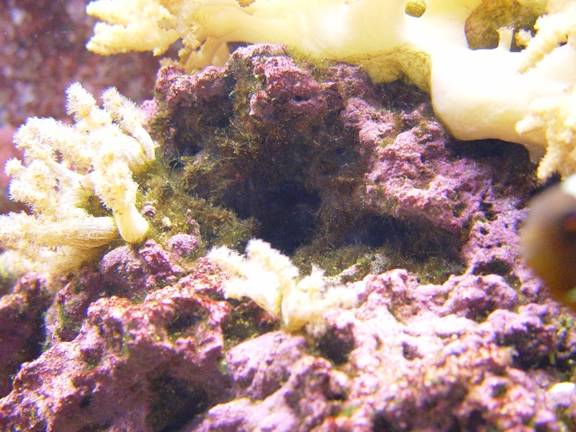
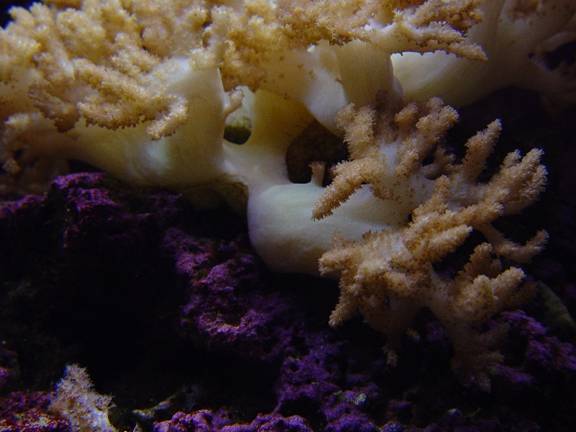
The full frame pictures below illustrate this spot metering technique. I started out centered on the dark hole in the rock, which resulted in lots of detail visible in and near the hole, but with the white coral over-exposed. Even the purple encrusting coral is a bit washed out.
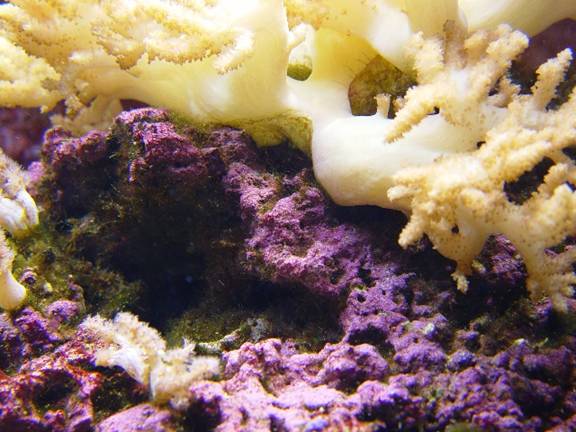
The second picture is centered on the purple encrusting coral, which results in a nice picture of the coral, but loss of detail inside the hole in the rock.
The third picture is centered on the dark underside of the white coral. The result is that the purple encrusting coral is now too dark, the hole in the rock is totally black, and the white coral tips are nicely exposed.
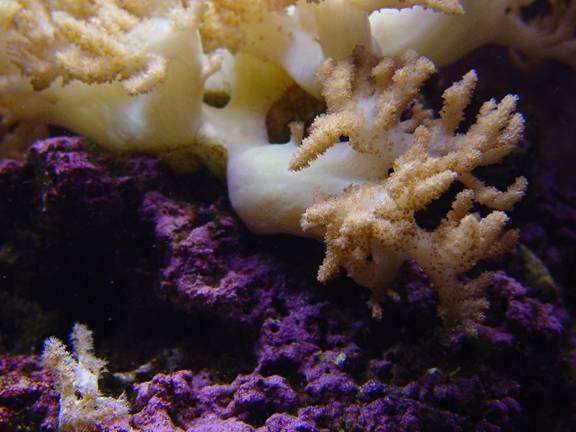
The fourth picture is centered on the brightest part of the white coral. This makes almost all of the image too dark.
There is no correct or optimal exposure for a given scene. There is an optimal exposure for an object in a scene once you have decided what object you are interested in. Use of this spot-metering technique can help you get the best exposure for the specimen you are photographing.
Exposure Modes
Some cameras only function in fully automatic exposure mode, but others allow you to select either your aperture or your shutter speed manually. This feature is not essential in tank photography, but it can be very useful when taking sports photographs, where control of the shutter speed is essential. It can also help you take low light pictures such as fireworks or control depth of field (discussed later).
We will continue to discuss the following topics in the second part of this article:
- Computer/Camera Connections
- Battery Time Display
- Batteries
- Powering the Camera using AC
- Zoom Range
- Large Lenses
- Virtual Zooming
- Close-Up or Macro Photography
- Depth of Field
- Decreasing Apparent Depth of Field using Post Processing
- Back to Macro Photography
- Chromatic Aberrations and the Aquarium Glass Prism Effect
Sample Images
Here are some images I have taken over the years, for your enjoyment. Please visit my web site, www.sover.net/~jbondy, and click on the two Reef Tank links, near the top, to see more of my photographs.
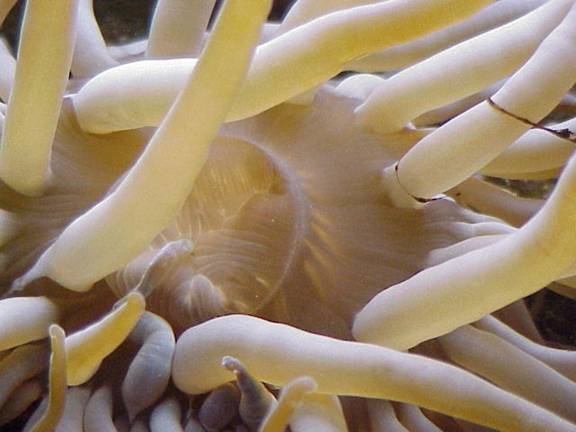
A close-up of an atlantic anemone
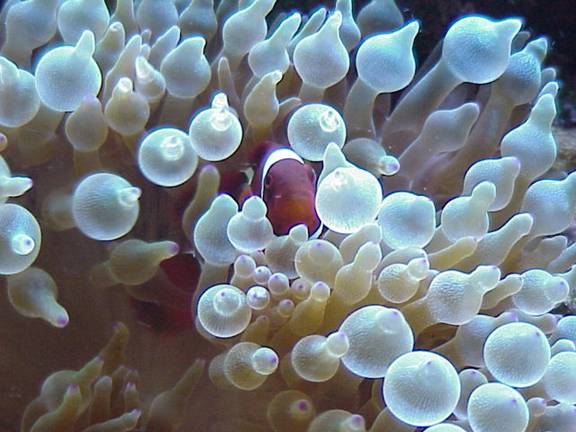
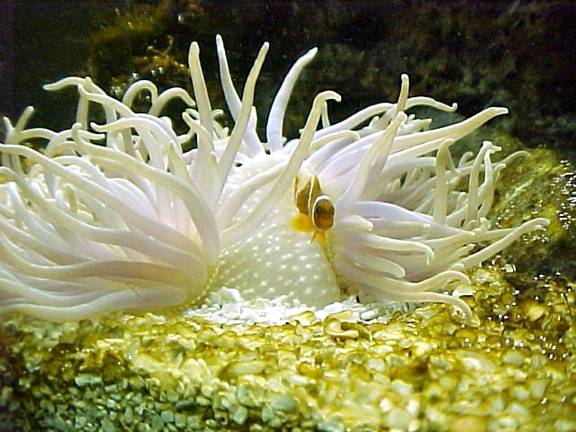
A bubble anemone with a clown fish snuggled inside
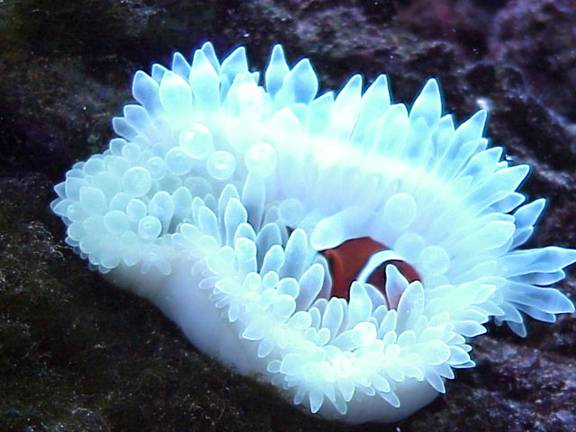
Another clown fish and anemone
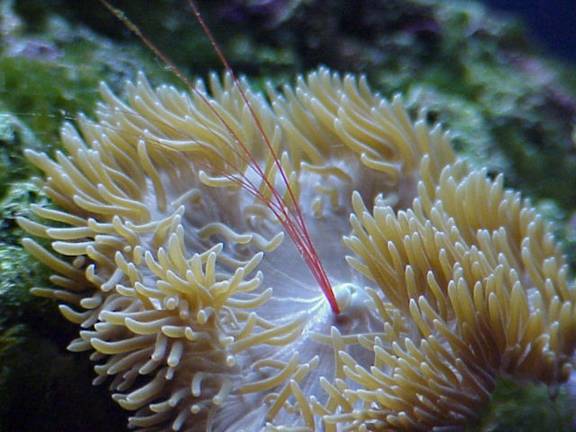
A flower anemone eating a shrimp casing
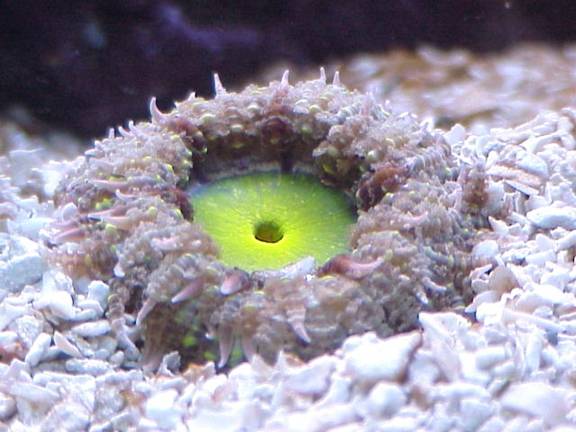
A green-centered flower anemone
A pacific anemone shows it’s striated under skirt
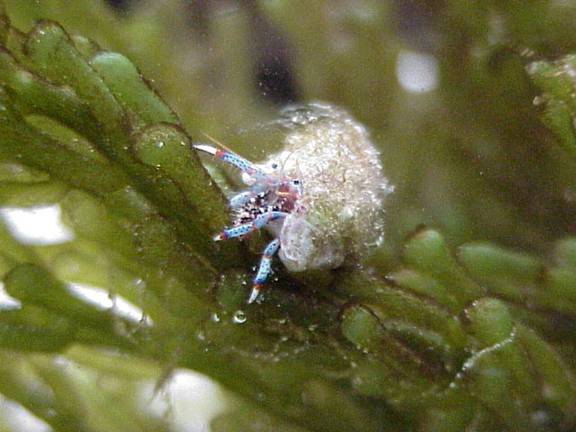
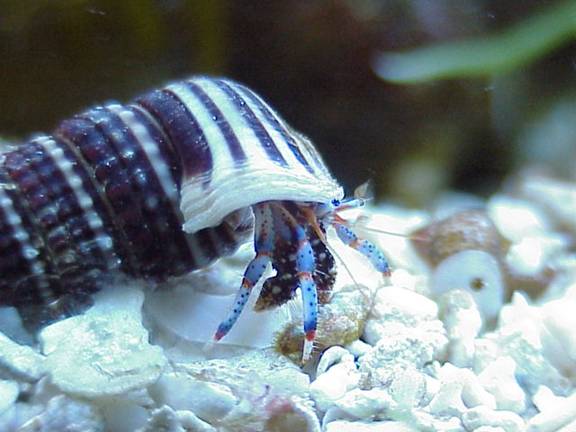
Blue legged hermit crab close-ups
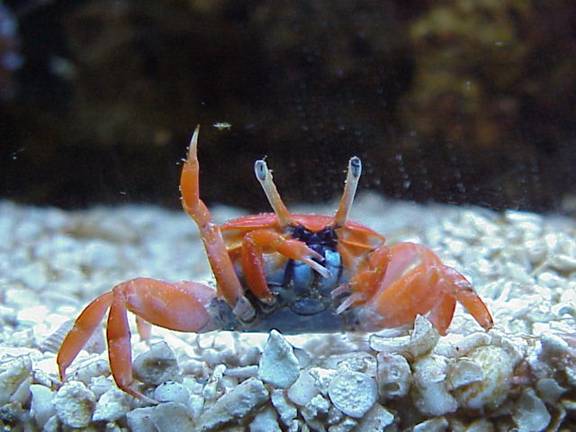
A red crab close-up
Author’s note: all of the pictures were made a uniform width, and that their size and resolution, as they appear in the article, are not at all the same as the original pictures

0 Comments