

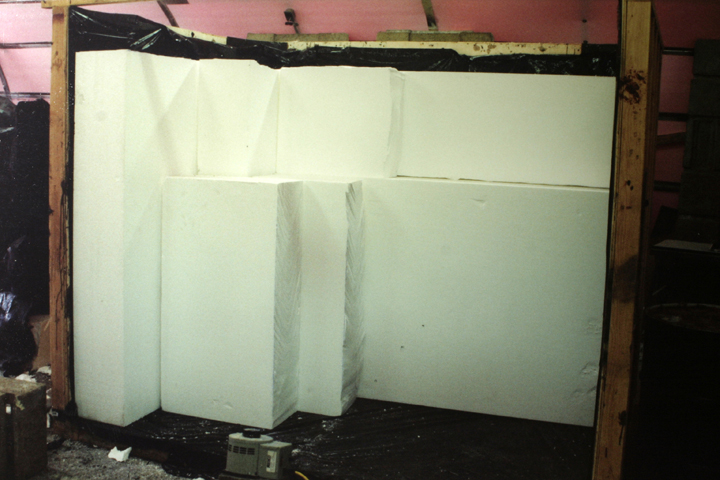
large blocks of Styrofoam before carving with hot wire.
In my last article I discussed identification and taxonomy of some temperate macro algae. If your interest has been piqued and you’re starting to think about setting up a tank to showcase some of these marine plants, this article may help serve as a guide. In this installment I will discuss the construction, set-up, and maintenance of a 2,000-gallon macro algae exhibit at Atlantis Marine World in Riverhead NY. Although a tank of this scale might not be feasible for most, equipment and techniques described here can be scaled down accordingly to accommodate your space and budget.
Building a strong usable base structure is essential to the success of a macro algae exhibit. This structure should be designed in such a way that allows for a lot of water flow throughout the tank. You will also need to keep in mind how algae will be placed throughout the tank. When suitable algae specimens are collected, they will be attached to rocks. This will require many flat areas to support the collected rocks. The theme of the Atlantis tank is the rock wall of an ocean inlet jetty. To create our jetty, we decided to build an insert out of fiberglass. In this particular set-up, fiberglass had many advantages over real rock. Locally, jetties are made up of large granite rocks. Unlike reef live rock, these rocks are solid, displacing a large volume of water and will carry a limited biological load. These granite rocks also far outweigh reef live rock of similar size. This increased weight of the rocks would create a safety concern. The size of the tank requires me to enter it for maintenance. Large granite rocks could become very troublesome if they were to tumble when I am in the tank.
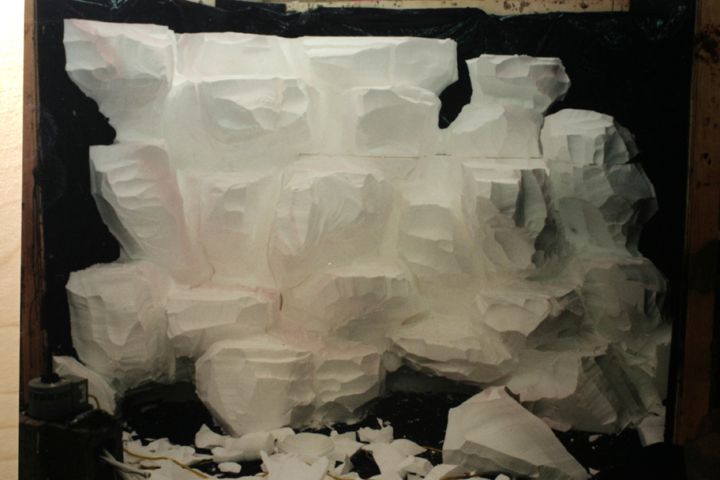
The Styrofoam after being cut with hot wire.
The first step in creating our artificial jetty was to build a three-sided mockup of the tank using plywood. This mock tank was then filled with large blocks of styrofoam. Carving the Styrofoam with a hot wire, the rough shape of a rocky wall was formed. The rough cut Styrofoam was covered with a layer of plastic. This plastic layer protected the Styrofoam when fiberglass and resin was applied (resin would dissolve the Styrofoam upon contact with it). Once covered in plastic, four layers of fiberglass were applied. Four layers of fiberglass ensured that the insert would be able to support a large amount of weight. After giving the fiberglass time to cure, the insert was removed from the plywood tank, and all the Styrofoam and plastic was removed.
Although most of the fiberglass would, eventually, be covered with algae, we still wanted to start with something looking as real as possible. To create a more natural look, a thickened resin, with color pigments, was added to the exhibit side of the insert. The thickened resin was then sculpted, like clay, to look like the rocks of a jetty. Upon completion of this step, the insert was moved to the display tank.
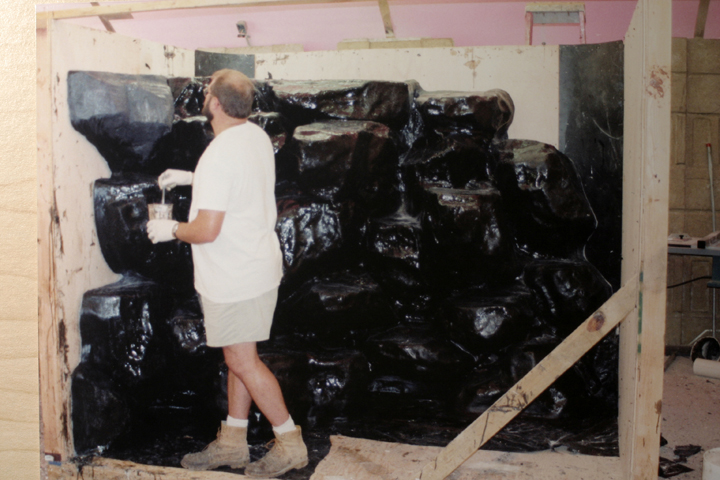
Styrofoam has been covered with plastic and 4 layers of fiberglass and thickened resin is being added to make it look more realistic.
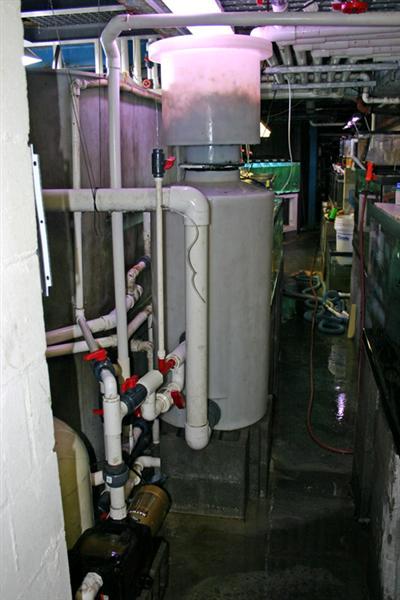
Initial filtration consisted of two high rate sand filters, each powered by a 2.0 HP Hayward Super II™ pump. One sand filter pulls water from behind the insert. To allow water to flow from the display side, many small holes had to be drilled in the insert. This suction line is important to ensure that there will be no stagnant water behind the insert. Upon leaving the sand filter, the return water goes to a 5 HP Aqua Logic™ chiller before returning to the tank on the display side of the insert. The second sand filter pulls from a 200-gallon sump, and the return is split into two lines. One line returns to the tank via three one-inch Sea Swirls™ and the second feeds several holding tanks (consisting of approximately 1000 gallons) that are connected to the system. Initially the use of a protein skimmer was discussed, but we decided against installing one. We thought the use of a skimmer would remove important nutrients that might be utilized by the algae.
As with all plants, lighting is extremely important. Without adequate lighting, the algae would not be able to carry out photosynthesis. Originally, a single 1000W daylight metal halide (Venture Cool Deluxe by Sunmaster™) was placed directly over the center of the exhibit. This is the same bulb that is used on our living reef exhibit (http://www.advancedaquarist.com/2007/2/aquarium/). Using only one halide, centered on the tank, we hoped to keep the greatest concentration of algae growing in the center of the tank, and not on the tank walls.
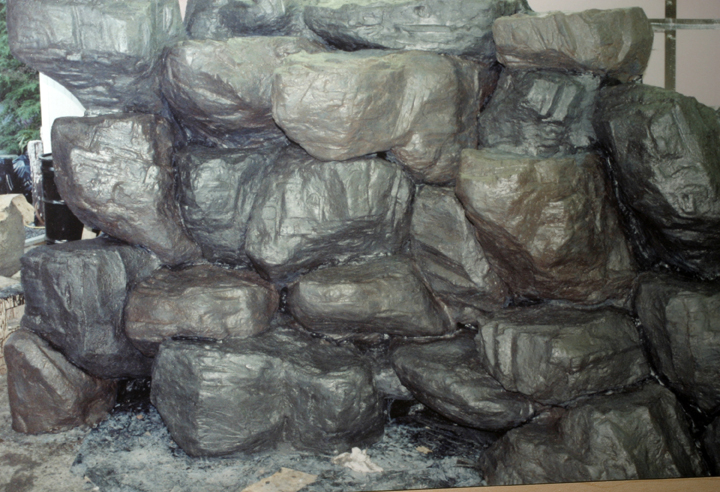
All fiberglass work is completed, and insert is ready to be moved to the exhibit.
At this point we had a tank with a strong base, filtration, and lighting, but no algae. To get the exhibit started, a collecting trip to Montauk, NY, was organized in March. The water temperature this time of year is in the low 40’s and the air temperature is not much higher than that. Unfortunately, we had no other choice as to when to go collecting for this tank. The “star” of the exhibit is to be Laminaria (kelp) and here on Long Island, NY, we are at its southern range and it can only be found locally during the winter months.
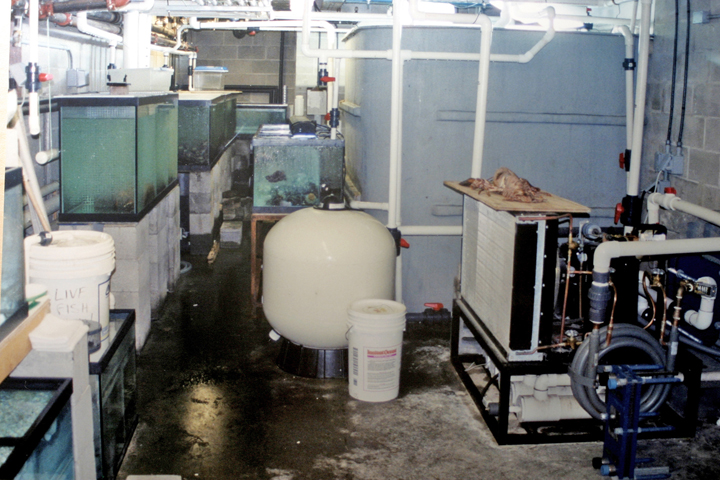
5 HP Aqua Logic Chiller, one of the high rate sand filters, and holding tanks.
Tank after being stocked with freshly collected algae.

Tank after being set up for a couple months.
While collecting, rocks that were small, flat and contained a high density of algae were sought after. Large rocks are not only difficult to transport, they are more difficult to place into the exhibit. As we collected rocks, their locations in the water column were noted. Knowing where the rocks were collected will ensure that they will be properly placed in the exhibit. Rocks that are collected in the shallows will require more light, and therefore should be placed towards the top of the exhibit. While rocks collected deeper, should be placed towards the bottom of the exhibit. Once back at the aquarium, the algae-covered rocks were placed in the tank.
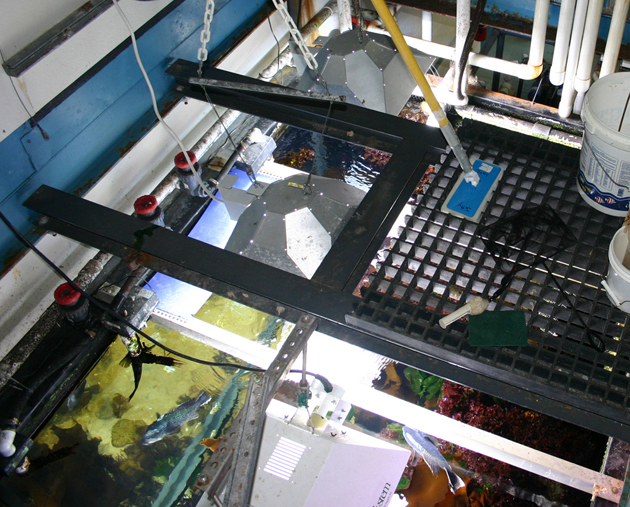
The current lighting set up.
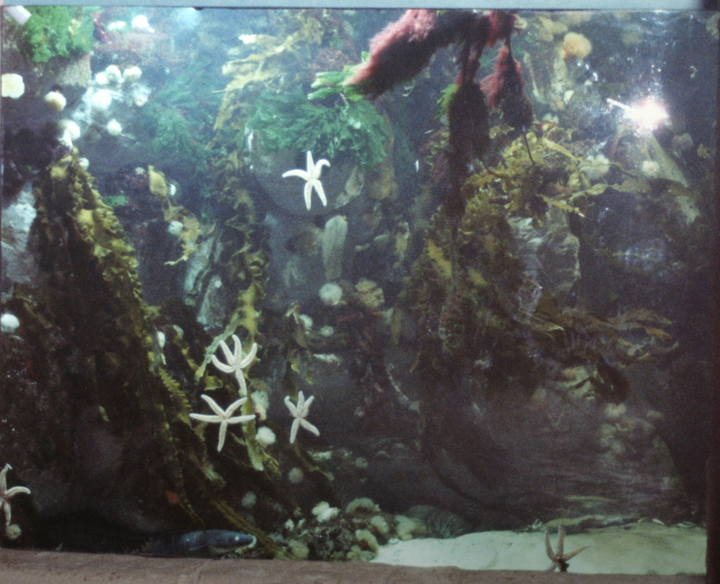
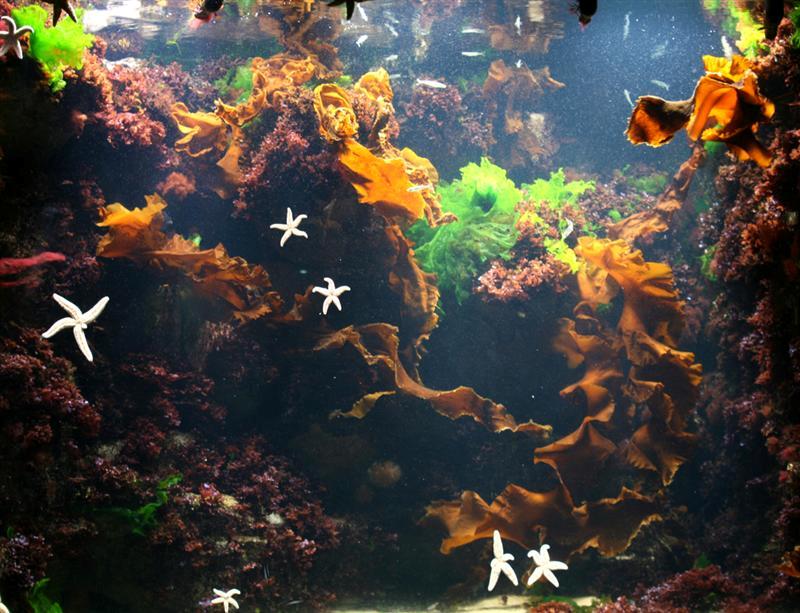
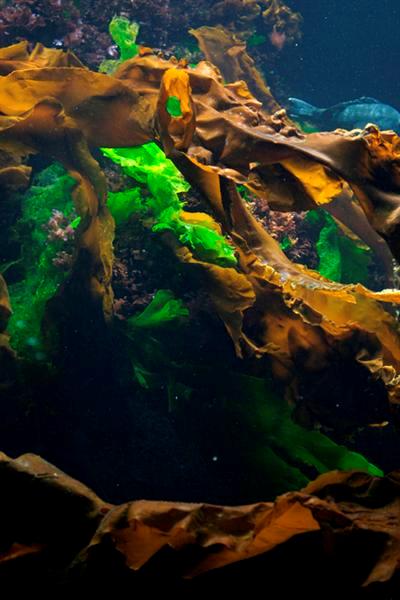
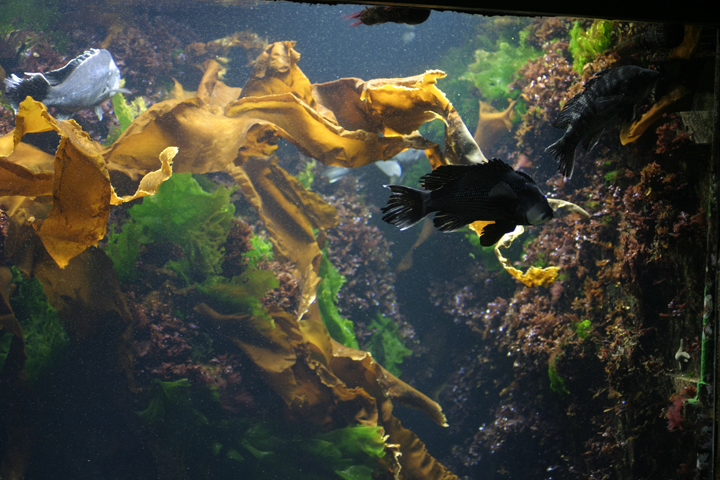
Finally, the tank was looking like a section of a current-swept jetty. Large blades of Laminaria (Kelp), bright green leaves of Ulva (Sea Lettuce), and the purple shimmering of Chondrus (Irish Moss) swaying in the current were very relaxing to watch. Sadly, this “relaxing” exhibit quickly became a thorn in my side. Within a couple of weeks, the blades of kelp started to get an odd growth form. Instead of nice flowing blades, the blades started to grow in a twisted manner. The once lush Ulva and Chondrus broke loose from their bases and ceased growing.
Overall look of the tank as it appears today.
So what could be keeping the algae from thriving in this tank? Temperature was right were it needed to be. Water quality was exactly the same as the water where the algae were collected. Current seemed adequate, as all the blades were moving back and forth. The only parameter that I was unsure of was lighting. Is one 1000W metal halide sufficient? I quickly added two more 1000W metal halides. Shortly after the addition of the new lighting I started to see new recruitment of Ulva and Chondrus. Even the Laminaria started to show signs of new growth.
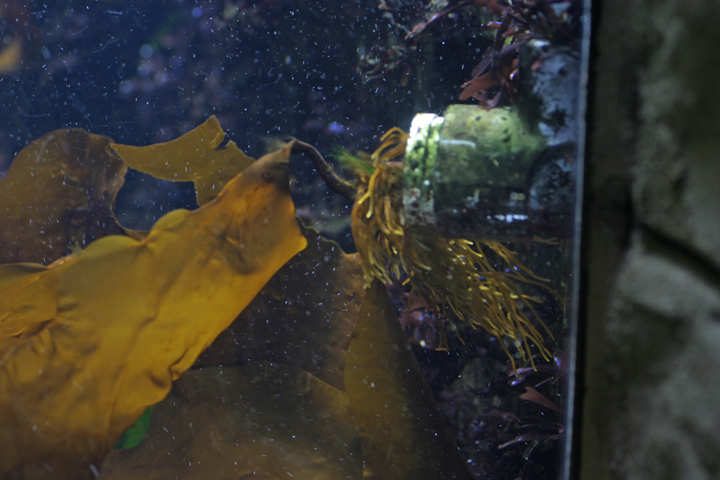
Kelp that has recruited on one of the returns to the tank.
A newly recruited kelp blade.
Shortly after the addition of the two new fixtures, I decided to try out some different bulbs to see if growth could be improved. I replaced the bulbs in the two new fixtures with 1000W horticultural bulbs by Solar Max™. After doing so, I noticed an increase of algae growth under those two fixtures. This increased growth rate prompted me to change out the third fixture with a Solar Max™ bulb as well. The Sun Master™ bulbs have worked very well in the reef exhibit, but the spectrum of the Solar Max™ bulbs seem better suited for the large macro algae of this tank.
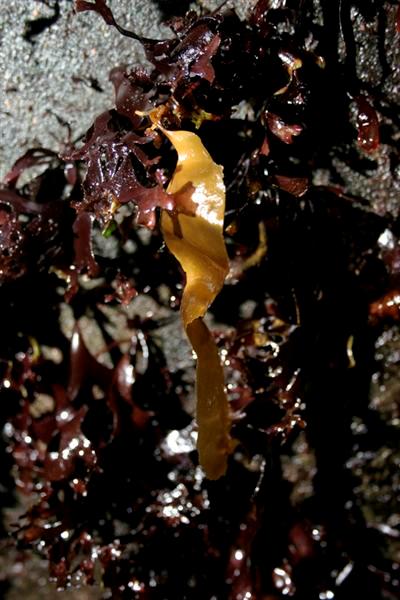
Laminaria and Ulva.
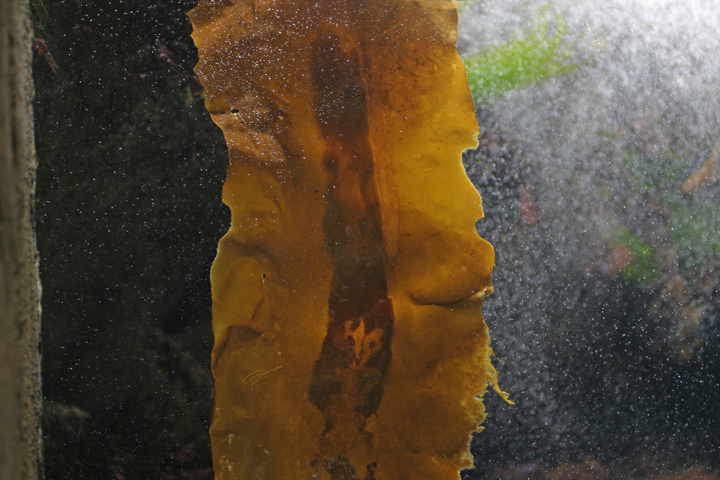
Dark band on kelp blade is reproductive sorus tissue.
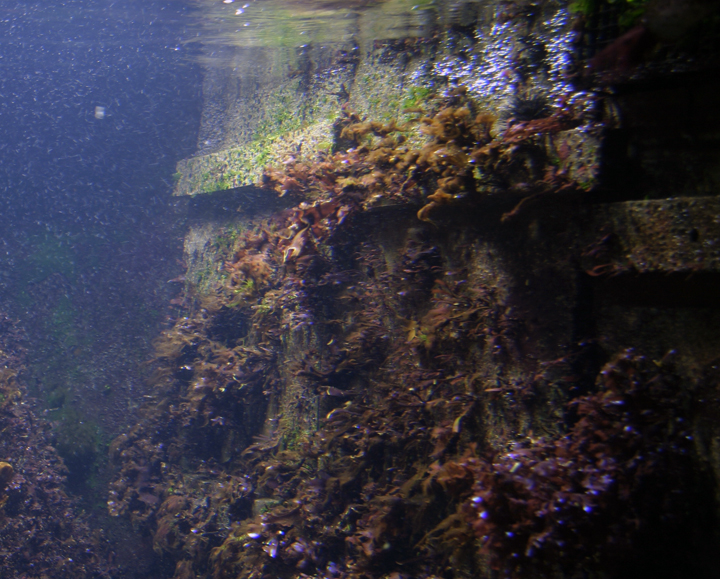
December 2008.
Now, with the added light, I started getting unwanted algae growth on the bare wall of the tank. Removing this algae and keeping the wall clear was no easy task. The holdfasts of these algae could not be just wiped off with the use of a cloth, they needed to be scraped off with a blade. This scraping eventually led to scratches in the tank wall, which made it even more difficult to keep clear. Instead of trying to keep the wall algae free, I decided make it part of the exhibit. An artificial dock, constructed out of Trex™, was attached to the side of the tank. Trex™ is plastic lumber that is commonly used for decks. Unlike wood, it is negatively buoyant and will not deteriorate over time.
Now that I had sufficient light I could sit back once again and enjoy watching the tank. No sooner did I get comfortable than hair algae began its attack on the tank. To my surprise, the phosphate levels were much higher than I expected them to be. I was getting levels >.5mg/l. How could this be? This exhibit is similar to a refugium on a reef tank. An aquarist adds a refugium to their reef tank to remove phosphates from the water that are produced by their fish and corals. So where are the phosphates coming from? There are very few fish in the exhibit so that could not be the answer. After a closer examination of the tank, I noticed several pockets of algae that had broken off and settled in crevices of the insert. These pockets were surely adding to the nutrient load as they broke down.
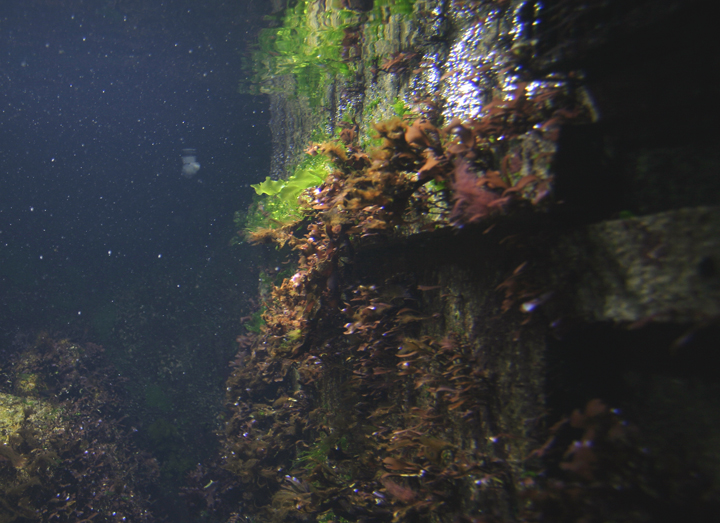
January 2009.
Removing these pockets of algae did help some, but the hair algae seemed like it was not going to leave without a fight. So I needed to bring in the heavy artillery: our local sea urchin, Arbacia punctulata. Approximately 30 urchins were unleashed on the hair algae and they plowed through it with ease. Once they knocked back the hair algae, I reduced the number of urchins in the tank to about six so they did not clear the tank of all algae.
Once the hair alga was under control, I needed to address the problem of why it appeared in the first place: the high phosphates. I had started removing broken-off pieces of algae on a regular basis, but the phosphates still remained high. Originally it was thought that the macro algae would use the phosphates, keeping them low or possibly so low that a source of phosphate (fertilizer) would have to be added, but this was not the case. It looked like it was time to install a protein skimmer. A skimmer was constructed out of 3 standard polyethylene containers. The contact chamber is two feet wide by four feet high. With the collection cup, the skimmer is almost six feet tall. The skimmer is fed by a 1.0 HP Hayward Super II™ pump through a down draft venturi. The addition of the skimmer seemed to do the trick. Phosphates started to reach a respectable level after the skimmer was placed online.
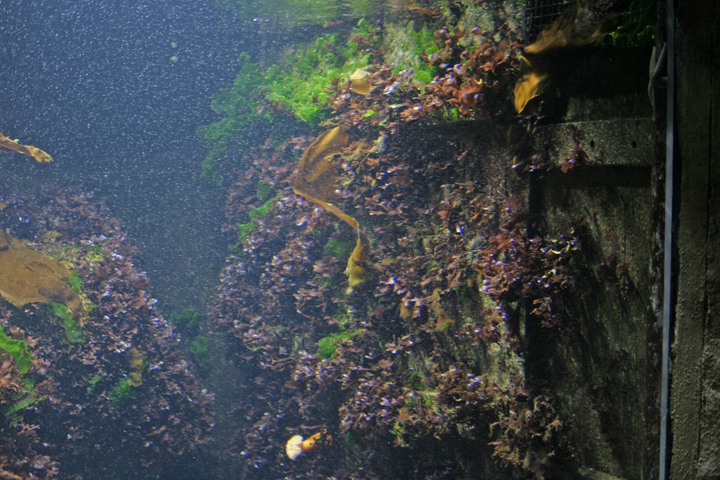
February 2009.
At this point, many of the major problems have been solved, and now some lesser, more welcome problems have arisen. As I mentioned earlier, flow is extremely important. As the algae would grow (some Laminaria blades were now over 4 feet) it would take more flow to get the blades moving in the water column. To increase flow, two 55gallon surge devices, constructed of 55-gallon barrels, were added to the tank. Each barrel fills in approximately two minutes and completely returns to the tank in 15 seconds through a two-inch pipe. This surge, in combination with the Sea Swirls™, keeps the entire tank in motion. The increase of flow also had a positive effect on recruitment of new algae. New algae started to appear in areas that had been devoid of algae since the tank first started.
After reading a previous Advance Aquarist article (http://www.advancedaquarist.com/issues/aug2002/chem.htm) about iron additions to a reef tank and the benefits to macro algae, I decided to see how iron additions would affect algae growth in my tank.
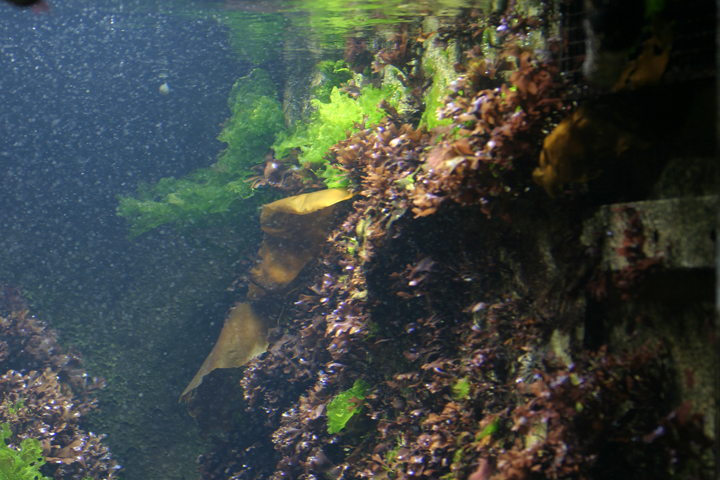
March 2009.
I started by using the dose stated in the article; 0.1 to 0.3 mL of a solution containing 5 g of iron for a 250gallon tank, dosed 2-3 times a week. For a 3000gallon system I dosed 3ml, 2-3 times a week. At first I did not see any affect, so I started to increase the dosage. With every increase, I noticed significant changes. Recruitment of all algae species was occurring at a faster rate. The most notable effect was the increased growth rate of the Laminaria. I started seeing growth rates close to 2cm/day. Currently I am dosing 300ml/week.
Basic maintenance of the tank consists of a 50% water change every 3-4 weeks. During water changes I take advantage of the low water level to enter the exhibit to remove any algae that has broken loose and settled in crevices. Pruning of the algae is also done at this time. With growth rates of 2cm/day, pruning is a necessity. If left un-pruned, I would constantly need to increase water flow to keep up with the growth.
April 2009.
Water parameters are as follows:
- Temperature: 50-52F
- Salinity: 32 ppt
- pH: 8.0
- Alkalinity: 2.6-3.0 meq/l
- Nitrates: 0 mg/l
- Phosphates: 0.2 mg/l
- Photo Period: center light, 11 hours / Outer lights, 8 hours
As with any living system, this tank has evolved continually in response to problems that have arisen, as well as new information and technology that has become available to me. Although a tank with temperate marine macro algae as the primary focus may be unheard of in the aquarium hobby, all of the equipment required is readily available, and as you may have noticed, many of the techniques involved are strikingly similar to common reef-keeping techniques already being employed.
A custom made protein skimmer.

0 Comments