

You’d think that taking photographs of a fish tank, be it fresh water or marine would be relatively simple – you have, after all, a captive group of brightly coloured subjects, contained within a small volume, over which you have total control.
However, as anyone pointing a camera at a tank will discover, it isn’t as easy as you’d first expect. In this article I intend to look at several examples of common aquarium photography subjects and explore the ways in which the issues inherent in photographing one medium from within another can be overcome. But first a look at or should that be a ‘look through’, glass.
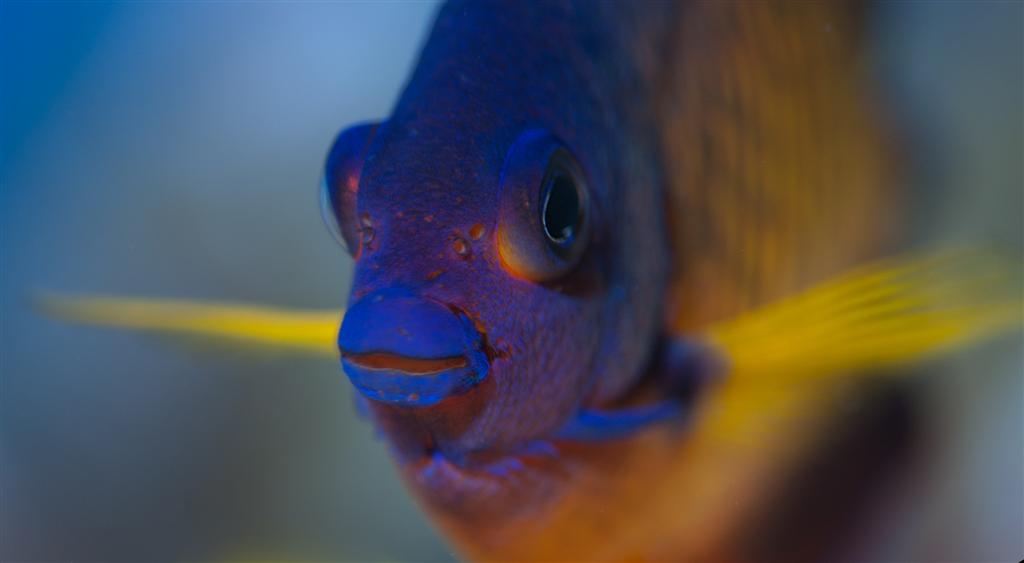
A rarity – a photo I’m happy with
Camera lenses have been carefully and expensively engineered to allow for maximum transmission of light with as little distortion as possible. The glasses used are of exceptional purity and chemically complicated, but even so, even the best lenses reveal distortions causes by the simple fact that the path of light through a lens and the interface between the air and the lens is not as perfect as we would aspire to. Physics exerts its undeniable influence, hence all camera lenses are a compromise between cost, the laws of physics and engineering. With aquaria we have an extra element to contend with; the glass or acrylic used in the aquarium’s construction.
Even low iron glass (such as Starphire) with high colour transparency is a far cry, in terms of optical performance from the glass used in a good quality camera and introduces a loss of detail that we must simply accept; this becomes greater as the thickness of the glass/acrylic increases. We can try to overcome this issue by photographing specimens in special tanks using thin glass or acrylics better suited to the purpose, but once specimens are in our main tanks we are limited.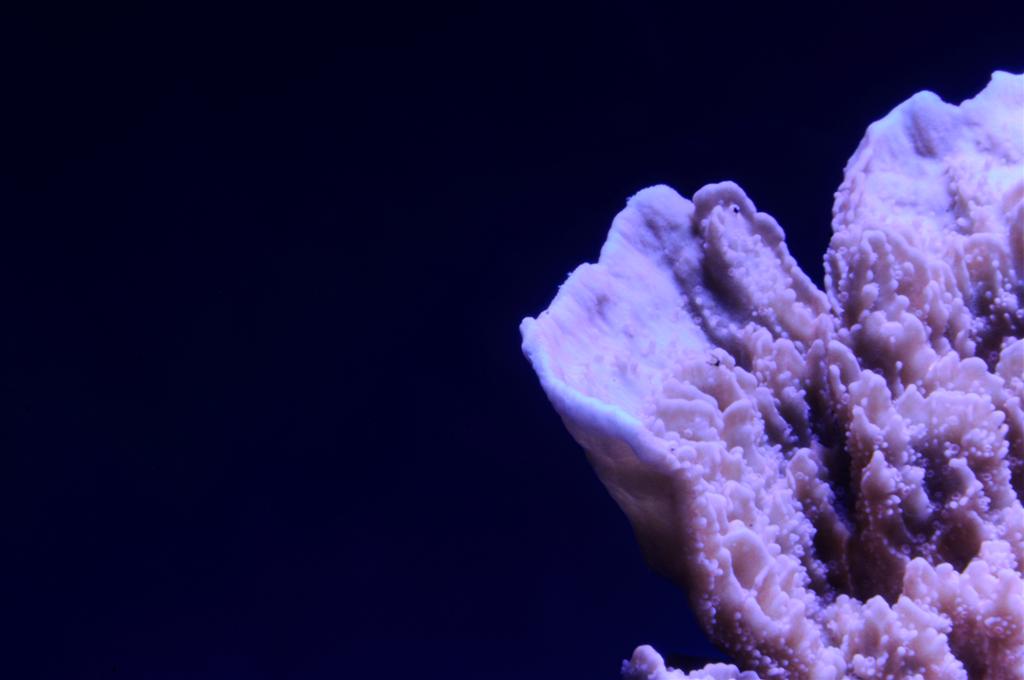
This raises one of the first common faults hobbyists face in aquarium photography and is directly caused by the glass/acrylic and is the most important tip I can share.
TIP 1: shoot your tank with the focal line at right angles to the glass.
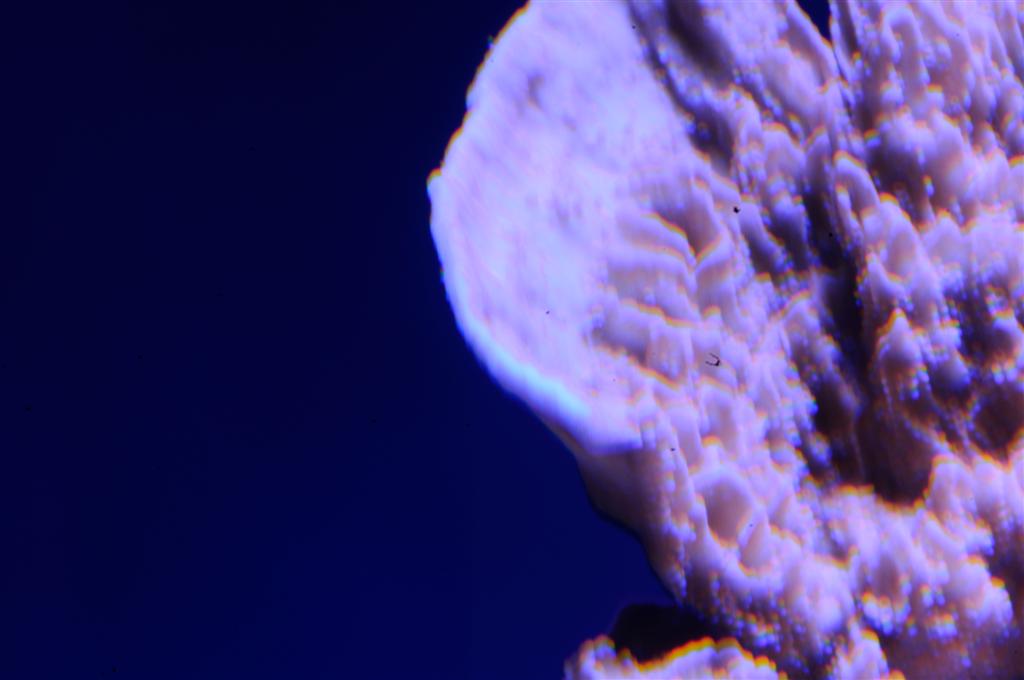
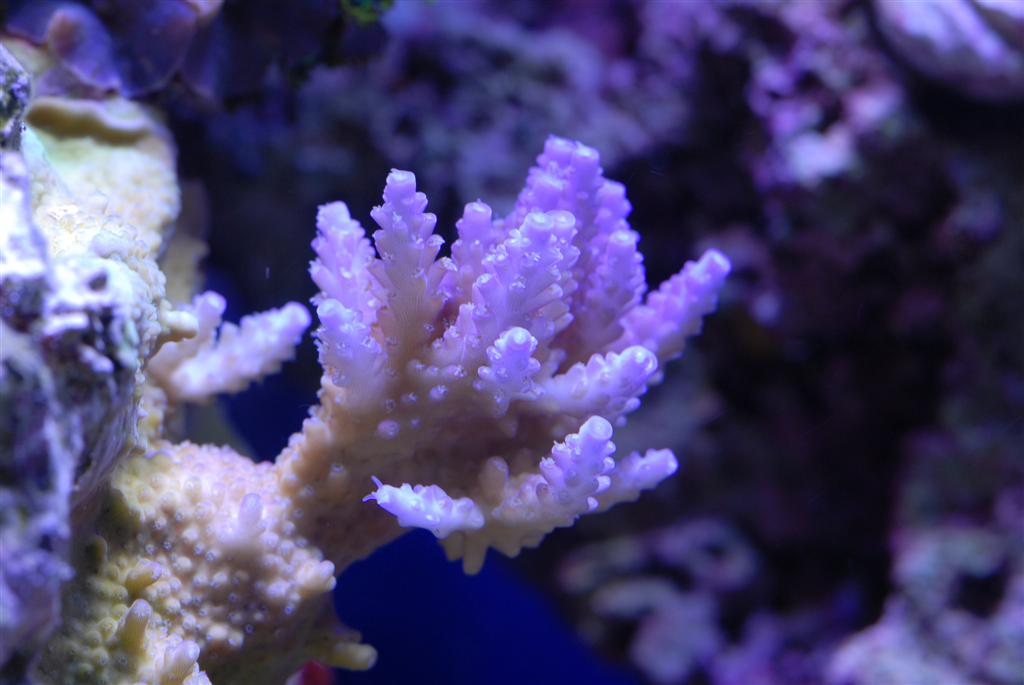
In the example below I present three images of a Montipora in my reef tank, shot using a Nikon DSLR with a Nikkor 105mm Micro lens. I’ve chosen to use a close-up (macro) shot to illustrate the point more strongly, the effect is lessened the further away from the tank the camera is positioned. Please note Nikon refer to their macro lenses as ‘micro’ and use the brand name ‘Nikkor’.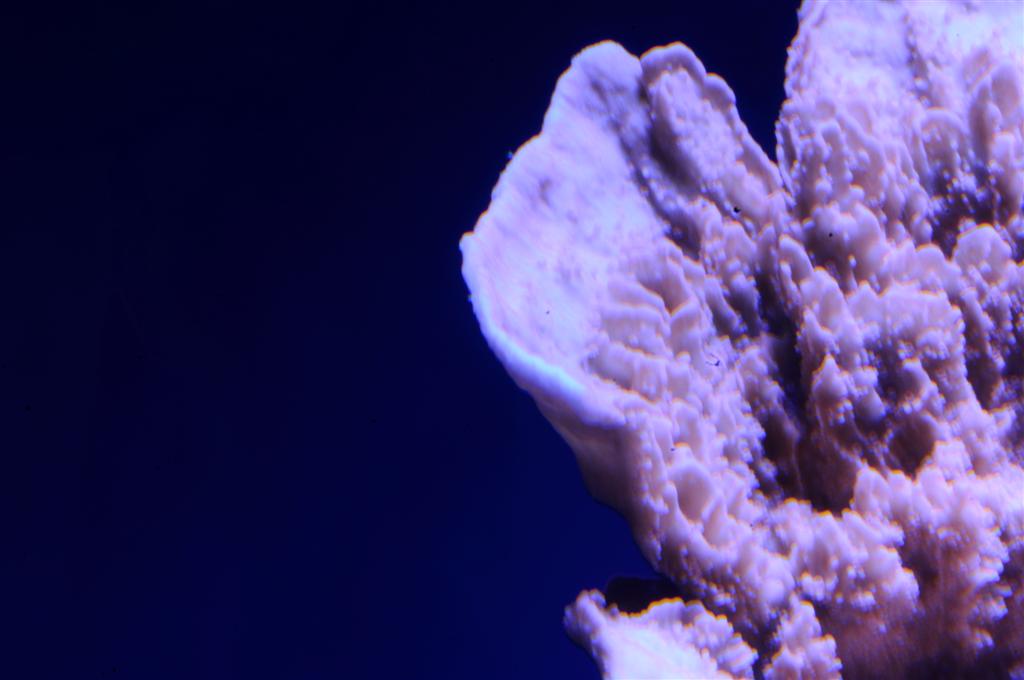
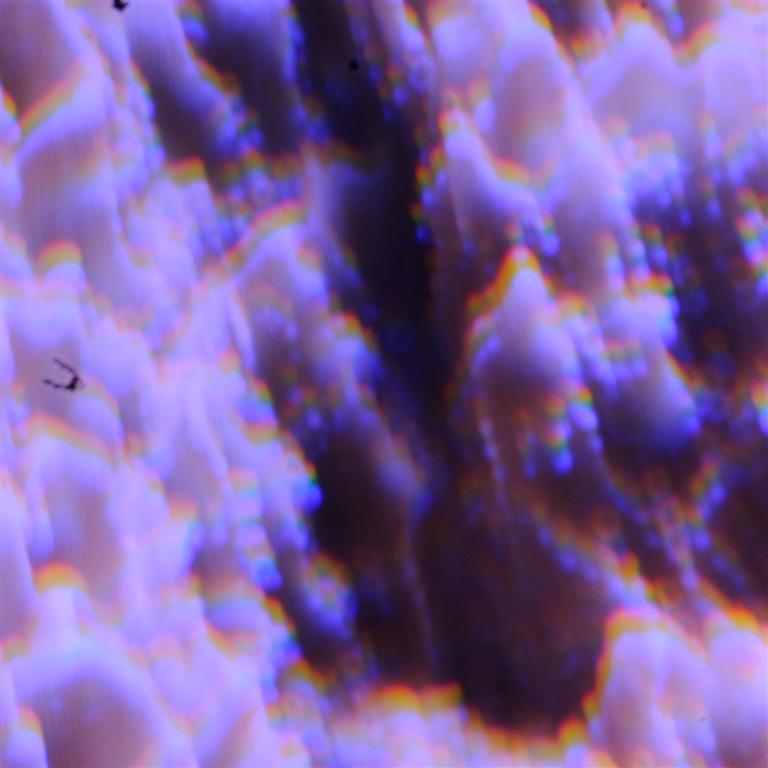
The first image shows the greatest detail and was shot with the camera correctly aligned to the tank glass – if I drew a line through my eye, the viewfinder and then the centre of the lens – then that line would be at ninety degrees to the glass. The second image shows the effects of being around five degrees off and the third around ten as the angle at which I’ve shot the coral changes.
What this selection of images shows us is that no matter what sort of camera gear you use, or how much you spend, the laws of refraction mean that being ‘off axis’ will limit the detail that can be captured.
In the examples above we can also see the effects of chromatic aberration, which Nikon and Canon and others have spent billions to reduce in their lenses using apochromatic glass and other features. Chromatic aberration is caused by the differential scattering of light as it passes through the interface between the glass, the water and the air – a prism effect. This introduces little halos of colour around details within the image.
Chromatic aberration is greater at the edges of the image and can be limited by shooting macro subjects within the centre of the frame and following tip 1.
Another technique you might want to try to ensure you get good alignment (and decrease the ‘shakes’ in your camera from your hand if not using a tripod, is to rest the front of the lens directly onto the front glass! This will only work on SLR lenses and some compacts that use internal focussing (IF) in which the lens doesn’t get longer or shorter as you focus and where a ring protects the front glass element of the lens.
Chromatic aberration is greater at the edges of the image and can be limited by shooting macro subjects within the centre of the frame and following tip 1.
Shooting Fish
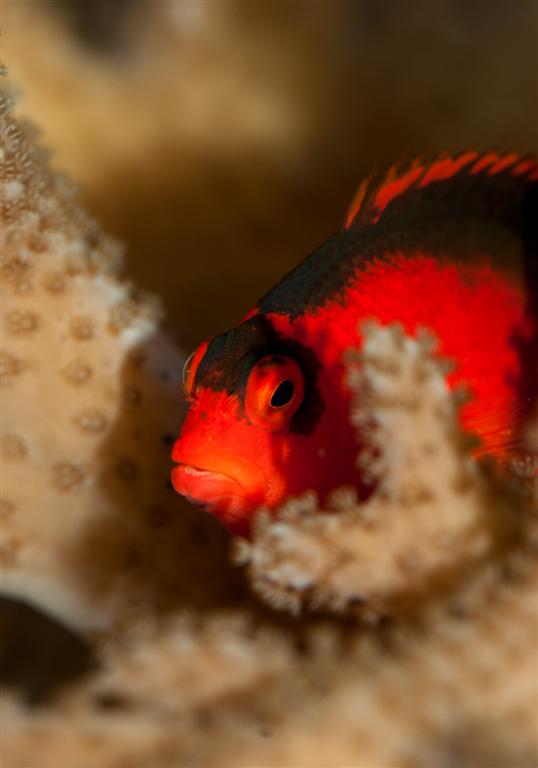
Fish that rarely move like this Scarlet Hawkfish always feature in many photographer’s portfolios
Shooting fish presents many challenges, not least of which the fact that they are fast moving and seldom listen to your increasingly frustrated calls to ‘stay still’. The best method I find for photographing fish is to either use a dedicated macro lens if you are an SLR user or select the macro mode on your compact camera
Macro photographs tend to have areas where the subject is shown in detail, but quickly becomes out of focus to the front or rear of the focus point (narrow Depth of Field). This tends to be due to the inherent nature of the lens used to get close or the camera (if using auto mode), choosing to use a wide aperture (small f number) to capture as much light as possible. This can add a certain attraction to an image and will blur the background giving the subject more immediate effect, but to gain the greatest detail across the fish’s body you will have to wait for it to be as close to ninety degrees to the focal line, as a your patience allows. I should also add that a narrow depth of field may make any scratches on the inside of the glass or other marks invisible on the final image as they become too blurred to register.
In this regard, compact cameras with their typically smaller sensors (apart from the latest generation of cameras with APS -C sized sensors like the Fujifilm x100 and Leica X1 and X2), exhibit greater depth of field than DSLR cameras with APS -C sensors and more again than full-frame format cameras such as the Canon 5D or the Nikon D4. Newer compacts (I’ve just bought a Fujifilm X10), have very low shutter lag and are quite good now compared to some of the earlier models.
Macro lenses do introduce their own issues, but the benefits are worth it, if you are careful and take sufficient consideration of their flaws/benefits. Thus my second tip:
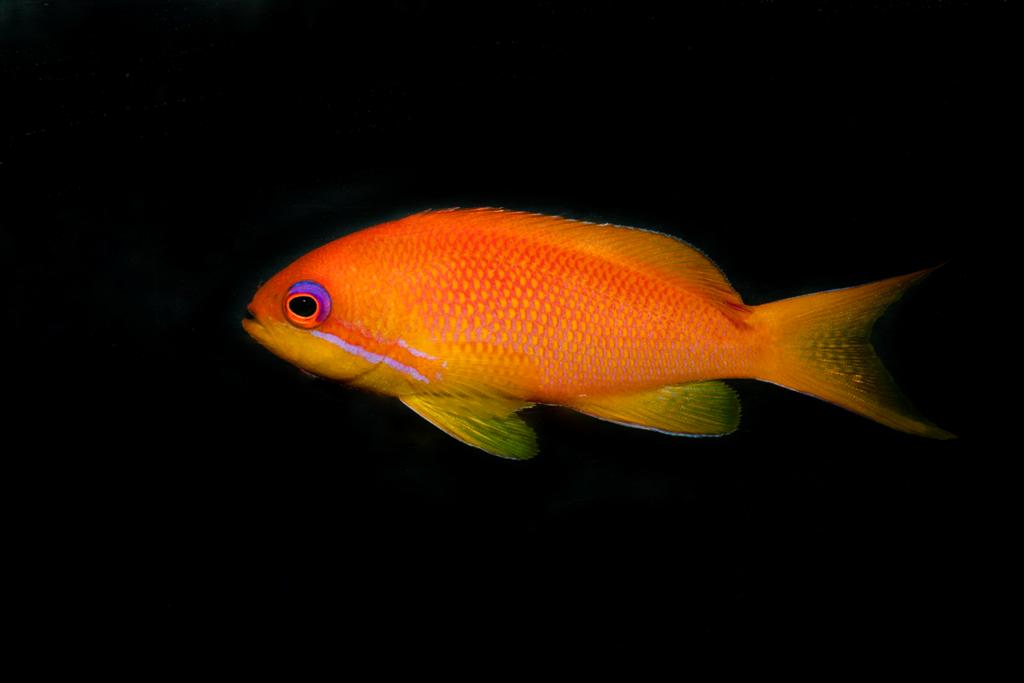
This Lyretail Anthias shot, taken with a Nikkor 60mm Micro (my favourite lens for fish photography from the Nikkor stable), shows that detail can be captured along the fish’s body as long as it does not adopt a ‘head on’ body posture.
Tip 2: Use macro to shoot fish
This image, shows just how quickly focus can fall away in front off or behind the focal point, (usually the fish’s eye), when using a macro lens. Even so the effect is quite appealing.
We are though, missing one key factor when photographing fish and one that forms my third tip.
Tip 3: use flash for fish
Flash offers several benefits when shooting fish or other tank inhabitants. It can ‘freeze’ movement, especially where a fast shutter can be synced to the flash (most SLR cameras will let you go up to 250/sec), it can illuminate a fish’s flanks (which are normally not illuminated fully due to top down aquarium lighting) and it can bring out the subject’s details, literally adding a sparkle to the eyes.
‘Off camera’ flash works best, with the flash guns used on SLR cameras being usually superb for the purpose. The distance between the lens and the flash on a compact camera is usually limited, so best success can be gained from getting as close to the subject as possible. The best way to visualise this is to think of a triangle with the subject being the furthest tip of the triangle and the lens and the flash gun forming the other two points. The greater the distance between these last two points the greater chance of avoiding taking an image of the reflection of the flash in the glass.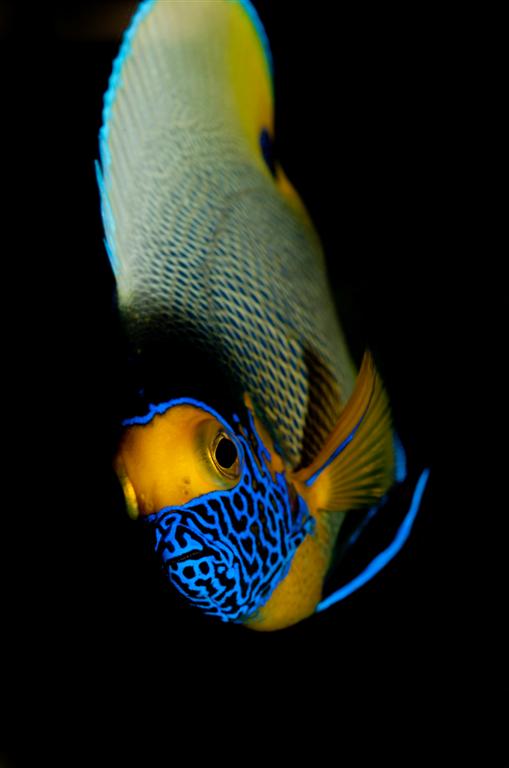
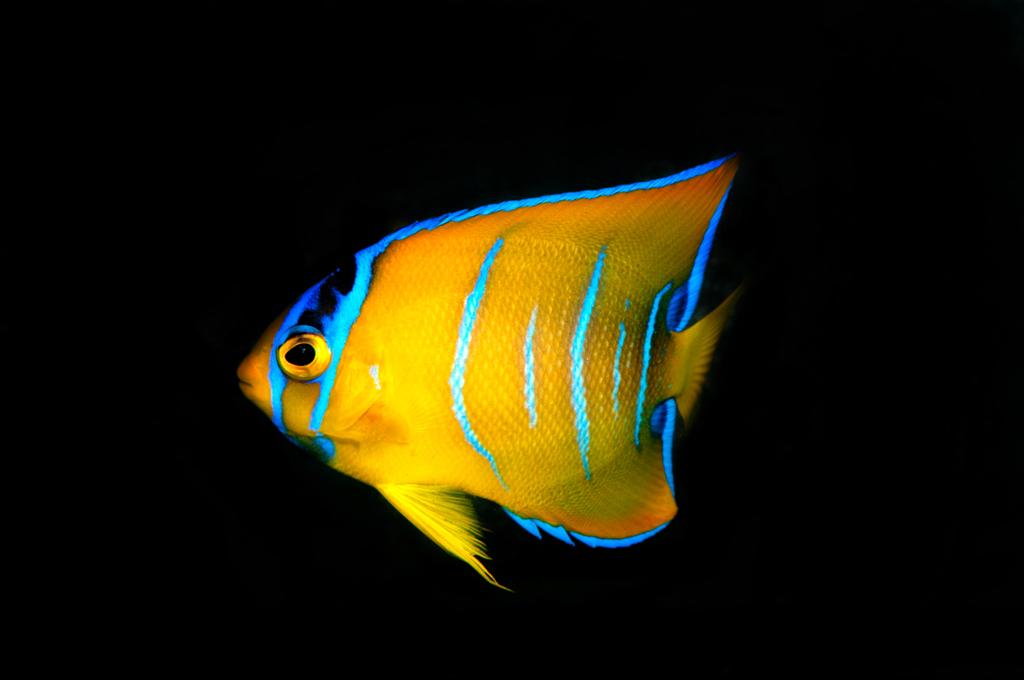
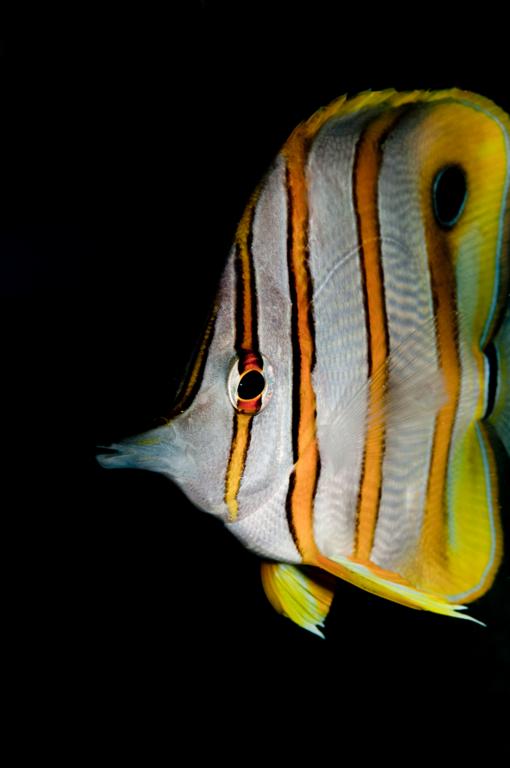
Advanced photographers using cameras with more sophisticated controls can choose to use very narrow apertures (high f numbers) to fully illuminate the subject, but will underexpose the background. In the following examples I used f22 and a flash to underexpose the backgrounds around the Angel and the Copper Band. In both examples I was careful to ensure the eye was in focus.
My plans didn’t work perfectly and I needed to use the Burn tool in Photoshop to complete the effect I was after by removing some elements of the background that still came through.
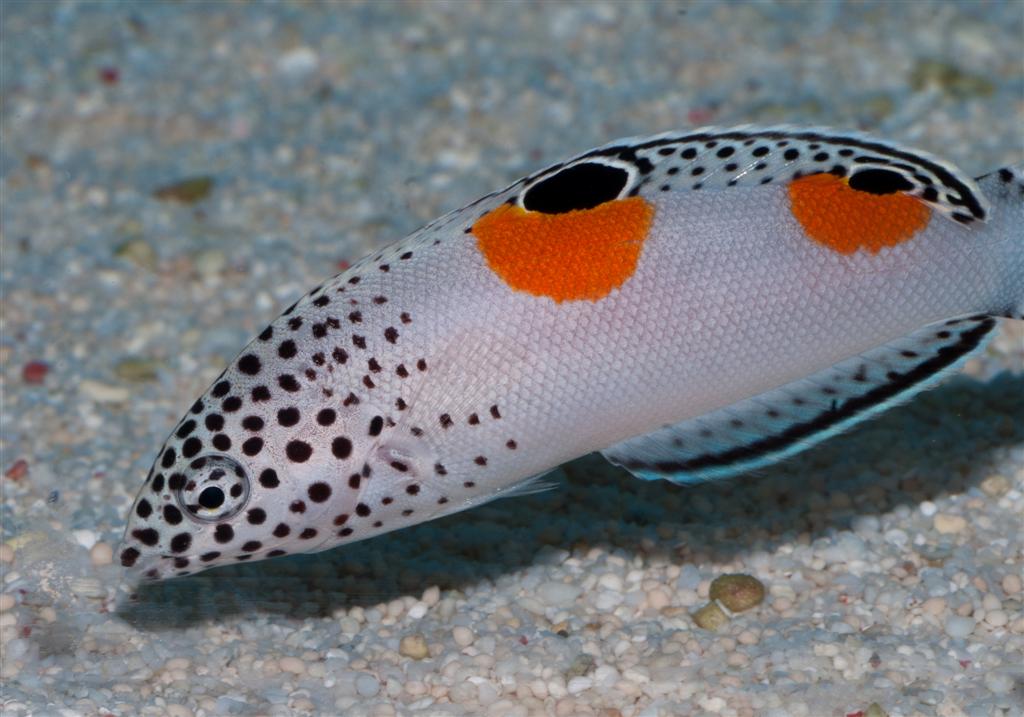
The downside of flash – a subject close to a background or substrate will cast a strong shadow which will create an artificial look.
Shooting corals
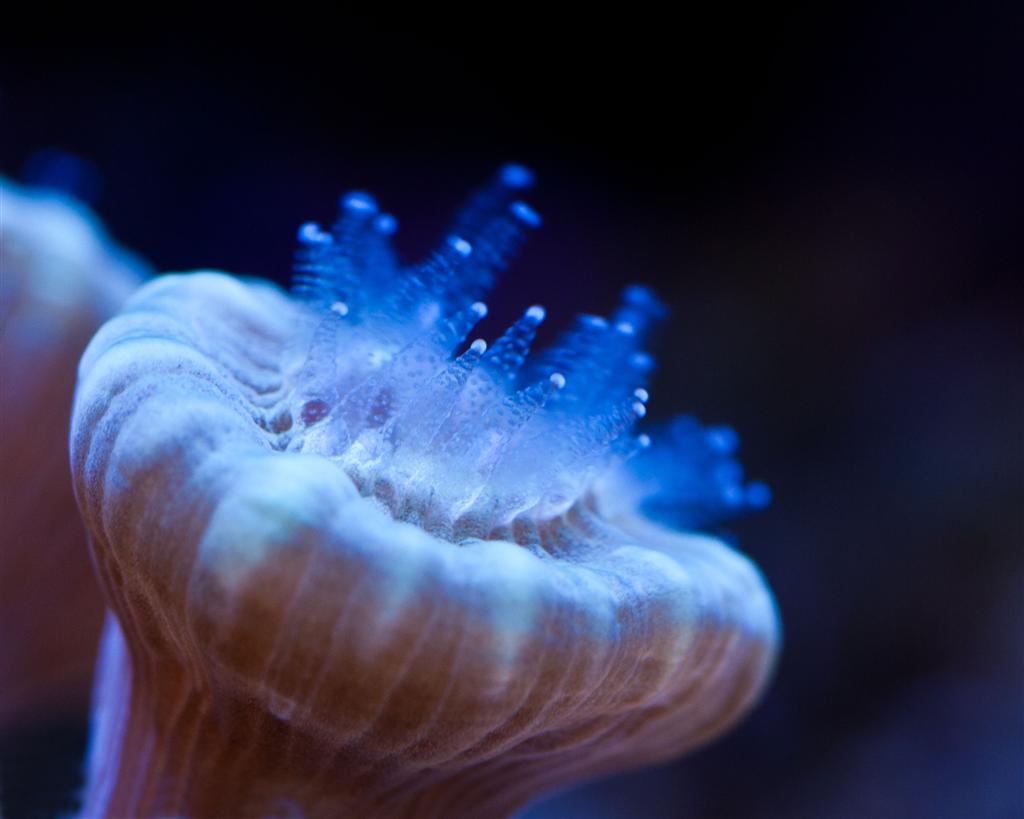
Detailed images of corals and other sedentary animals are always sought after and can be easily taken with most cameras – SLRs or compacts. The chief concern for shooting corals is the movement created by water flow. Not an issue for acroporids when you are not trying to show polyp extension, but key when trying to shoot soft corals or corals with large polyps such as Euphyllia.
You can choose to ‘freeze’ movement using flash, but in this instance the best advice is my next tip.
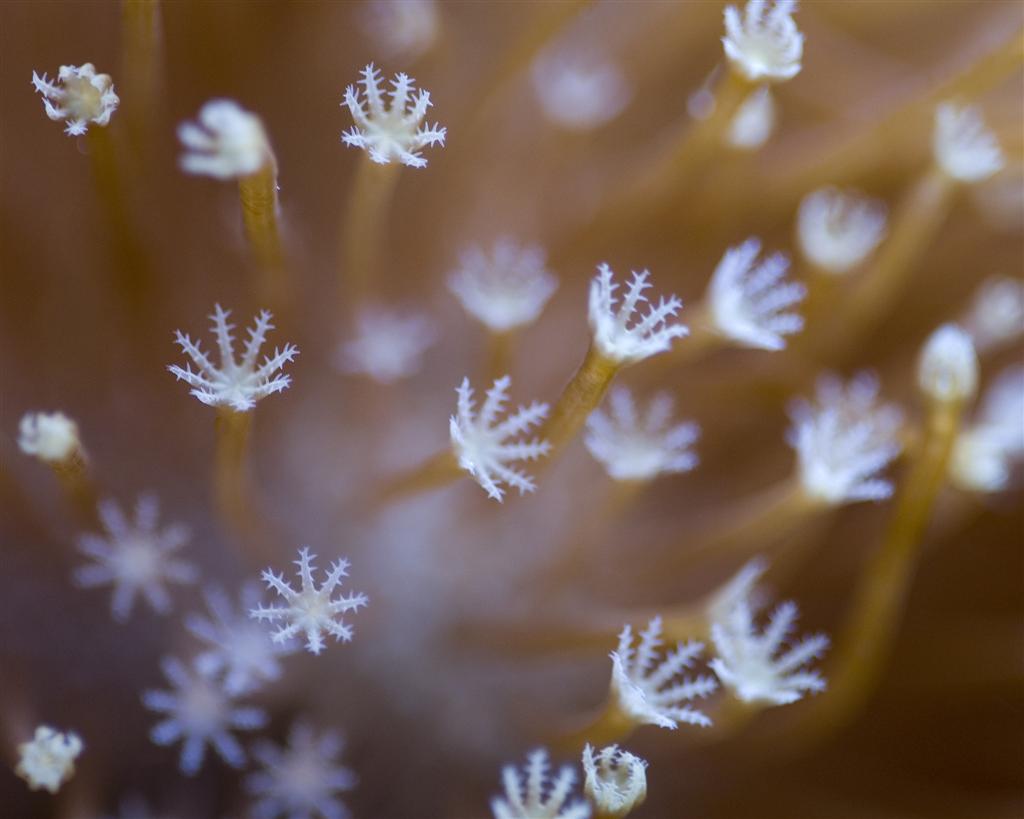
A close up shot of a Sarcophyton. The naturalistic look is created by avoiding flash and turning off the current and a very steady camera held on a tripod
Tip 4: for corals, turn off the current and use a tripod
Close up shots that reveal the detail of corals, their tissues and polyps again rely on macro lenses, but standard lenses and more limited compact cameras are perfectly adequate for recording a coral’s structure and growth over time, but as mentioned a tripod is best to provide a firm platform for the camera. I suggest this approach, as it will capture as much detail as possible by using a narrow aperture and require a slow shutter speed (greater Depth of Field). This, unless you are using a very high ISO, will mean a tripod and even better -using the camera’s self-timer or remote release as well. I’d also make sure you remove any marks, algae or salt from your glass that are easily overlooked, but could ruin a good shot.

Zoanthids make a great subject for macro work
Another macro shot, this time a Caulastrea. The very close focus and the narrow depth of field meant some of the polyp was blurred.
A ‘standard’ lens was used to shoot this coral, in this case an 18-55mm ‘kit’ lens that came with one of my SLRs. The photo will never win a photo competition, but shots like these are useful for recording growth and for ID purposes.
The whole tank shot
Getting a good overall shot of a system is a great challenge that calls for several techniques. I often see systems shot by aquarists shooting ‘off axis’ which as we’ve seen reduces detail and is a real shame. Again the best tactic is to use a tripod and align the camera correctly. Some tripods have built-in levels, but several small levels are available that can be mounted into the camera’s hot shoe. Increasingly cameras have ‘electronic horizons’ built in that make this easier, especially when framing the shot in the rear screen, though they only show roll and not yaw and pitch, to steal a nautical metaphor.
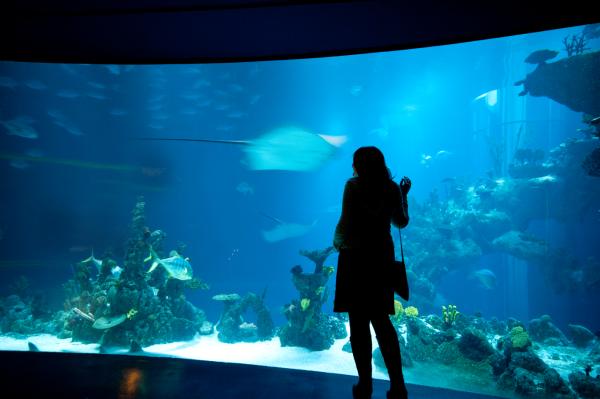
My home system… OK, this public aquarium was a challenge to shoot with reflections from other exhibits causing some real problems.
Lens choice for the whole tank shot is determined by the tank’s size. Average sized tanks of say 400 litres mean that a standard lens can be used, somewhere in the region of 35-50mm is ideal, but for really large tanks it’s wide angle time. Wide angle lenses or the wide angle setting on your compact will capture a lot of light and in general will record a good amount of detail (though some wide angles lose a lot of detail towards the edge of the image). The main problem with wide lenses is the distortion they introduce – the fish eye effect. This can be dealt with in post processing (see below), but with lenses in the 20mm and wider bracket there’ll be an awful lot of distortion to correct.
As can be expected flash is best avoided due to reflection (though professionals may have access to studio flash that can illuminate an entire tank), and the tanks’ own lighting will have to suffice. Given the lack of flash, fish are likely to be blurred as are soft corals and LPS corals. This is easily overcome in the latter example by turning off the current, but with fish – you may just have to live with it. Of course if your lights are bright enough you might be okay and with cameras performing ever better at high ISO values you may be able to get a tank shot, in which the fish are captured and the detail retained. Only your experimentation will determine the answer, though do be aware intense lighting can create strong shadows and not illuminate the sides of your corals.
Increasingly, we see a lot of shots of tanks in night or actinic modes – when light output overall is very low- if this is your choice then choose a very slow shutter speed that will blur your fish to such a degree they will not register on the image at all – rather this than smears?
Post production – Photoshop
Is using Photoshop cheating? Well, sometimes ‘yes’ and sometimes ‘no’. Personally, I don’t have the patience or skill to digitally add rare fish to my system or increase the extent of my corals, but I do believe there are some key options that Photoshop offers that we should use on a regular basis.
Tip 5: use Photoshop to correct your mistakes and deal with your camera’s faults
Photoshop offers several very useful tools and I will list just a few of the simple ones that I use all the time:
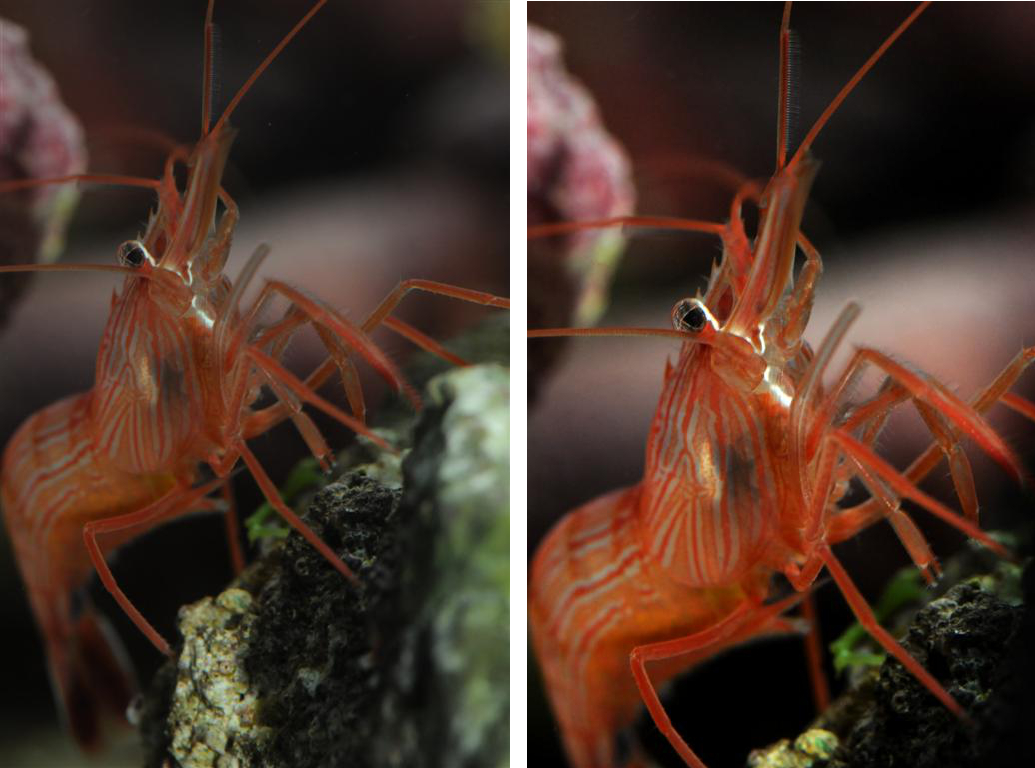
Before and after. I’ve removed some particles in the water and some on the lens, added some contrast in the levels menu, a little sharpening and of course chosen a tighter crop to create a far more usable image.
- Spot healing tool – get rid of the bubbles in the water or the marks on your glass.
- Clone stamp tool – ‘paint’ over one part of the image with another. Digitally hide a powerhead or a heater for example, with a piece of coral or live rock.
- Select image/transform/skew to correct distortion caused by a wide angle lens and make the sides of your tank parallel once more.
- Select enhance/adjust lighting/levels… to access the levels sub menu. Use this and the brightness/contrast slider to correct exposure.
- Explore the options presented in: enhance/adjust colour/adjust hue to deal with overly blue images.
- Try using the RAW setting on your camera and then manually determining a white balance in Adobe Camera Raw to get a very natural look.
Photoshop is like most tools, used carefully and with skill, it can only enhance your efforts, but avoid over cropping and over sharpening, especially on images shot using a high ISO rating.
That’s it, five tips for better aquarium photography, happy shooting.
NOTE: I have referred to SLR cameras throughout, and apologise to anyone using film who would prefer I distinguish between SLRs and Digital (D)SLRs. I also apologise to people who use other software than Photoshop. For Nikon users who use RAW files, I must recommend Nikon Capture NX2 as a superb piece of software. I believe Canon users have a downloadable codec that works within Photoshop.

0 Comments