

This article will attempt to help the advanced amateur make better pictures of their live marine specimens, and to help them make better judgments regarding photographic equipment and techniques. Whether you intend to use a digital or film camera the basic principles of photography remain the same — the engineers at Kodak, Sony, Epson etc. do a phenomenal job at engineering digital cameras to have similar or better response to light than film. Light hits a photosensitive area and it is captured. However, Just because there is better photographic technology available, it does not mean the camera operator will create better images. This article is aimed at helping the user make better pictures by avoiding some basic pitfalls, while offering some options that the user might not have known.
Note: This article assumes the photographer has basic photographic skills, their camera can utilize off camera flashes, and the camera allows for manual or has multi-mode functions.
This article will be laid out in the following format for ease of use.
- Photography considerations
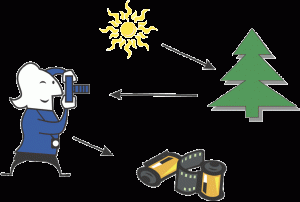
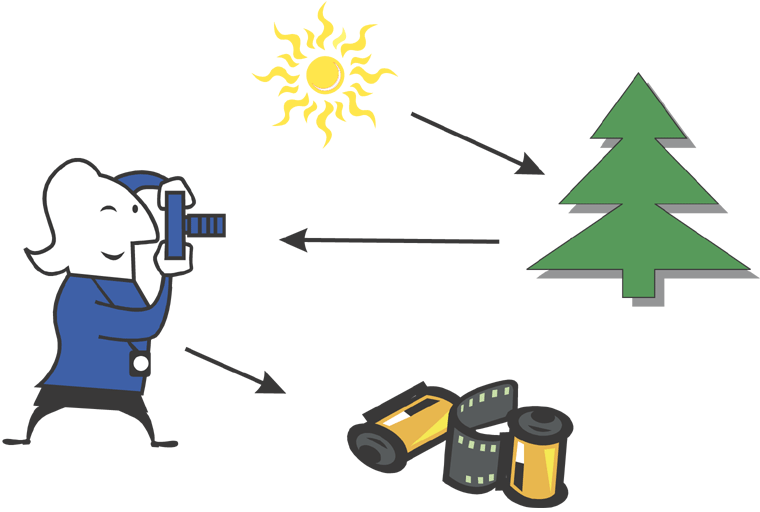
Simplified photographic system: Light source -> Object -> Light sensitive device -> Storage
- Basic photographic and photographic lighting techniques
- Digital photography
Section 1. Photography Considerations
Like almost everything else, making a good photograph takes experience, time, good technique, and sometimes a bit of luck. One of the most apparent benefits of digital over film is that you can make a lot of bad pictures with very little material waste and cost. One of the problems of digital photography is storage and management (this will be covered in the section on Digital Photography).

This is an effectively framed image, as shapes and objects are juxtaposed to one another creating a more interesting composition.
Photographic techniques — Framing Your Picture
The frame is the most essential component of making a good picture. It is imperative that the camera operator look carefully through the camera before engaging the shutter. I like to set the camera frame or composition before pressing the shutter. One scans the entire photographic frame to visualize a proper background. Basically, the job of the photographer is to remove any distracting visual information from the scene. Once you have a reasonably thought out background, the photographer can now work on introducing other elements into the picture, for example fish. The quality of the picture will improve drastically once the photographer removes unwanted or distracting information from the frame. Please note, when photographing in macro / close up mode most of the background is automatically eliminated.
Compositional weight
A good or pleasing composition is difficult to define well. Many times subjectivity plays a very important role in this arena. When I use the term compositional weight I am referring to the visual objects in a frame and how they interact with on another to produce a well balanced picture. For example, many amateur photographers produce pictures with compositional problems caused by center framing. These photographers take the object of interest and plunk it smack in the middle of the frame, which usually makes for a boring image. Often, taking your main subject and placing it slightly off frame will make for a more interesting composition.
Poorly framed image, due to subject is ineffectively centered.
When your main object(s) are in your composition it is important to consider the space around these objects, otherwise the important objects will not have visual strength. The basic concept here is in the contrast of shapes. Round shapes look rounder when juxtaposed next to square shapes or straight lines. This is analogous to warm water feeling warmer or even hot to the touch if your hands are cold, sweet next to sour, etc. Simply, the organic nature of animal specimens can look even stronger if they are next to a square shape or even the straight edge of the photographic frame.
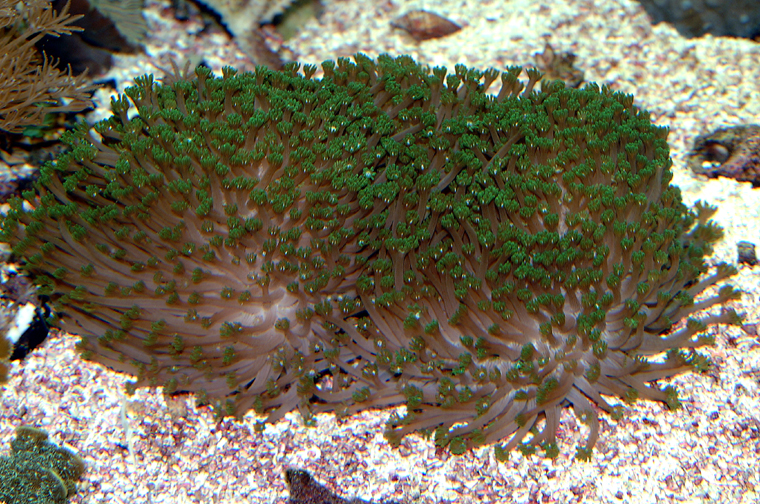
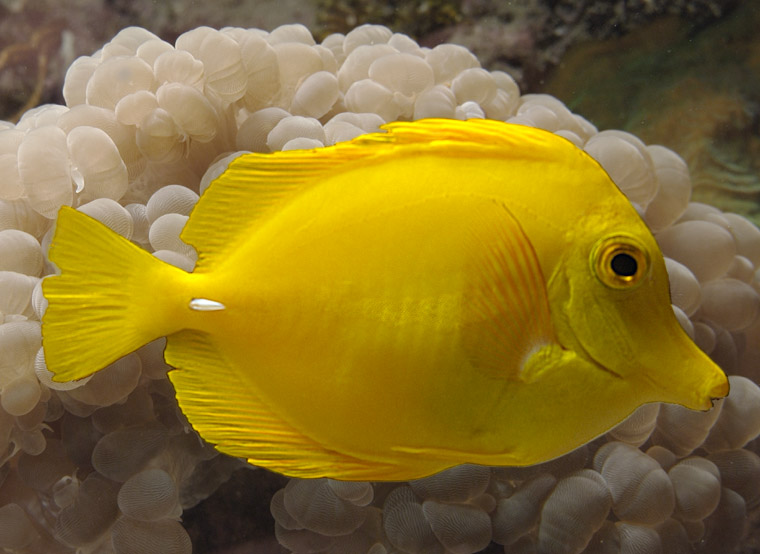
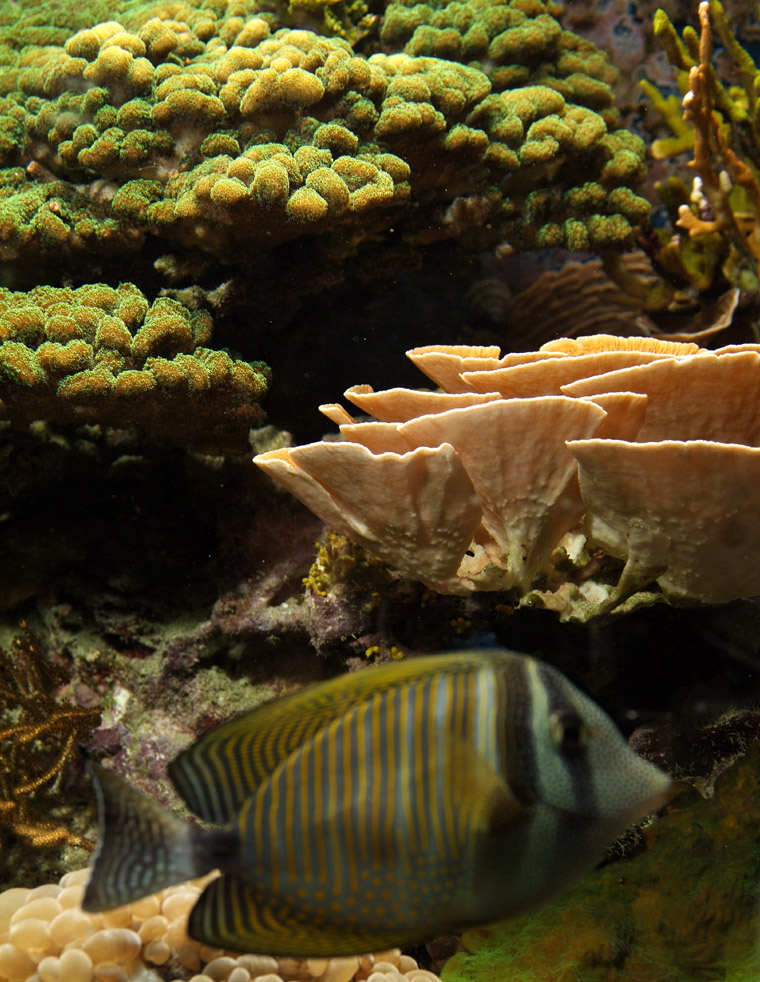
This image effectively uses the frame to enhance the shapes of the specimens to counterbalance the fish.

The shape of the specimen is enhanced by using its shape against the background created by the camera frame.
Tone Control
Similar to shape, contrast, tone and color contrast play an ever-important role when making pictures. It is as obvious as how black printing on white paper produces legibility. If you have isolated the object of interest in your frame, for example a light colored fish and photographed it against a lot of light material, your object of interest may disappear into the noise. One needs to be careful not to go too far to the other extreme — if you make an image of a black surgeon fish against a white back ground, chances are you will lose all visible detail in the dark areas.
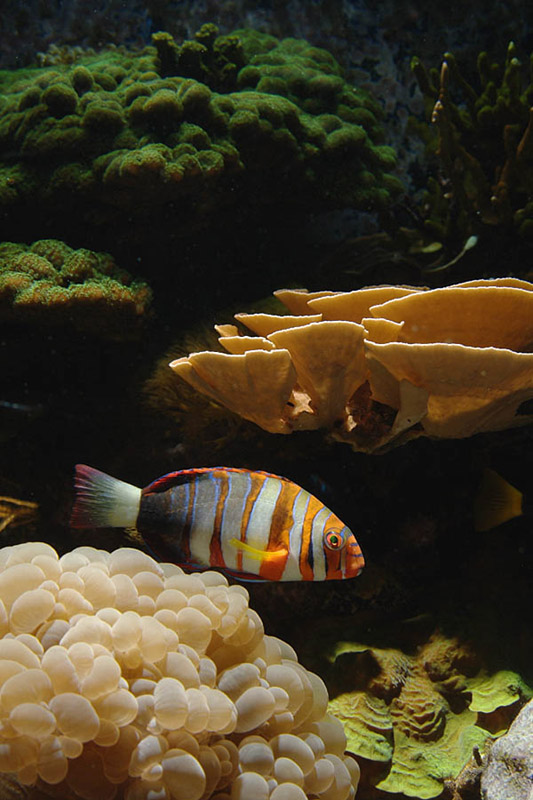
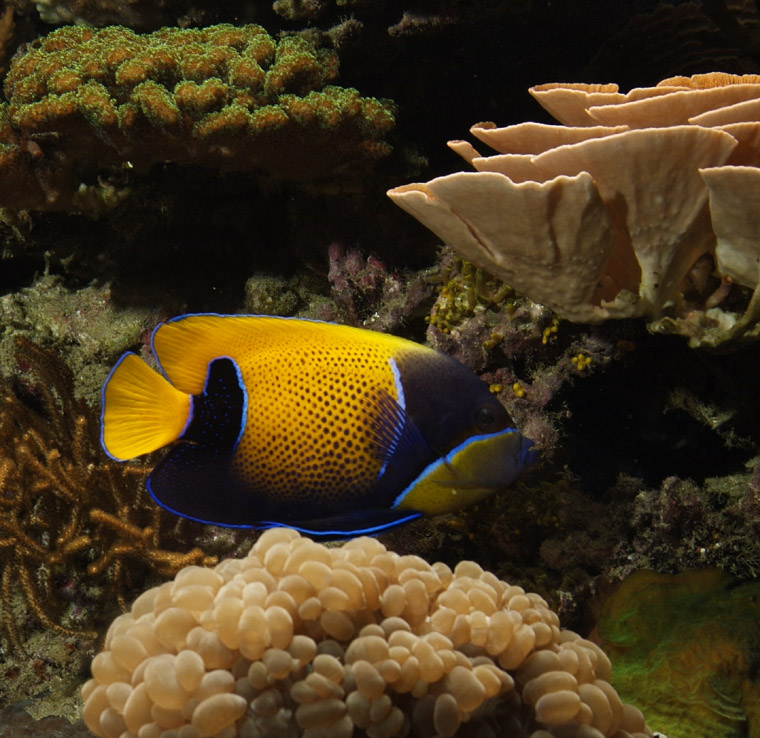
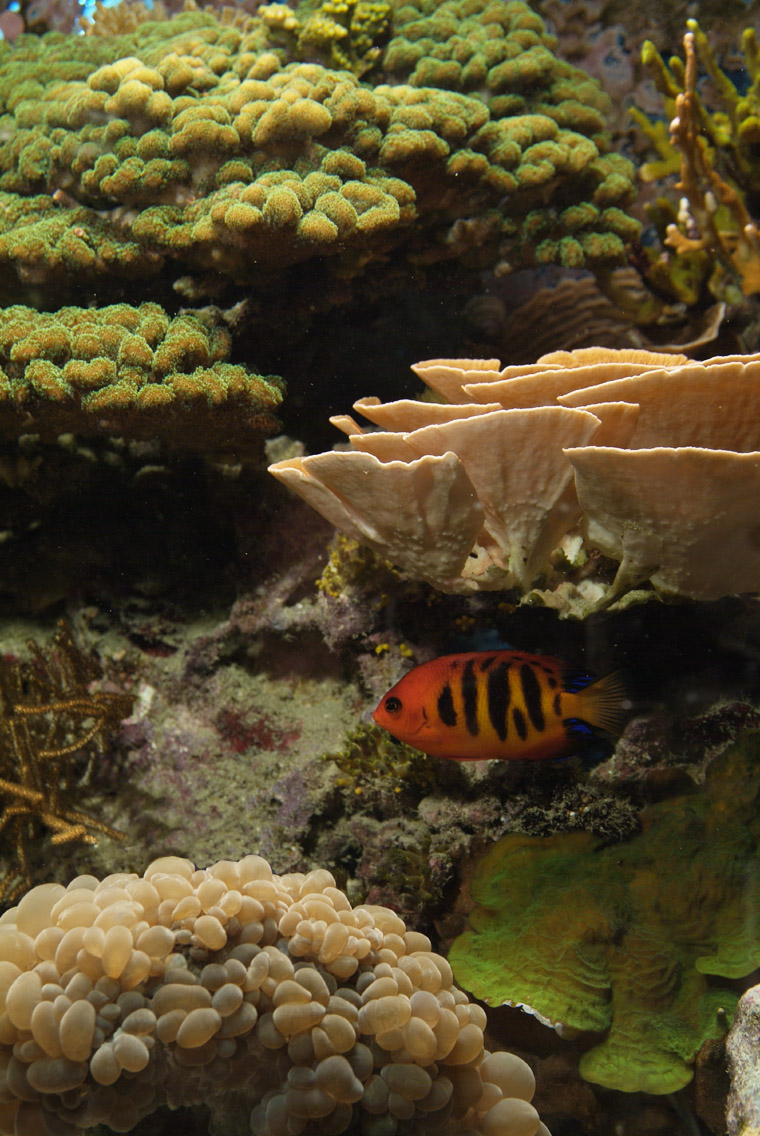
Color Contrast: The fairly neutral and monochromatic background effectively strengthens the fish in the foreground.
When making color images both tone and color play important roles. Generally a good tip is to photograph a specimen against a monochromatic background. Trying to control both tonal and color contrast in the same frame is very difficult, especially when you are making pictures of such dynamic subject matter as aquaria. What a lot of photographers do is to throw the background out of focus; this will enhance the focused element by suppressing shape contrast and by softening the color in the background.
Making good pictures especially if there are many elements in the aquaria is not easy. If one is only interested in getting good specimen images it is much easier. In this case, you need to be mostly conscious of the negative space in the frame. If you wish to challenge yourself even more by juxtaposing multiple specimens in the tank, I would think about seeing your tank as a stage, where a theatrical event is taking place. I would start by making a pleasing composition of the sessile animals, macroalgae, corals, etc. and take many frames as the fish swim into your stage.
You must remember that once you make a still frame image, the human eye is very critical of any visual defect. The eye is much more forgiving when visual components are in motion; unfortunately, we see motion all the time, so it becomes more difficult to analyze aesthetic problems.
Tonal Contrast: This image shows how a fish’s shape can get lost in the background caused by a lack of tonal and color differentiation.
Specific challenges to photography home aquaria
Photographing home aquaria presents unique challenges that require consideration. I usually try to analyze the shoot before I pick up my camera. The major problems with photographing home aquaria is the glass front of the tanks, the light sources lighting your tank, access to and round the tank (for photographic lights and vantage points), room environment, and a host of other problems of lesser importance. Here are the initial steps I take before I begin a shoot:
-Room environment. Since all home aquaria have a glass front that will reflect you (the photographer), the room, and any piece of photographic equipment in front of the tank including your light source the photographer needs to remove the ambient room light or put up a black screen in front of the tank. The black screen is ideal since the lights that light your tank will ultimately light the room from which the tank is viewed and photographed.
The reflection is caused by the light source being perpendicular to the camera.
Glass front. The glass front of the tank holds a bounty of problems. The biggest problem is when you point the lens through the glass at a skewed angle, the sharper the angle the more glass you are photographing through. When you photograph through a lot of glass, one losses resolution, colors start to alias, and the color of the glass becomes more pronounced.
The aquarium’s glass can degrade image quality when photographing tank specimens at steep angles
The specimen is much clearer when the camera lens is perpendicular to the glass of the aquarium
Access To The Top And Back Of The Tank
To properly light a fish tank for photography, access to the top of the tank is crucial. Ideally the light should be at least 4 feet from the top of a tank that is 2 feet high. This seemingly far distance is to reduce the effects of light fall off (the lit scene gets darker the further away from the source – this effect gets more subtle as the scene that is being lit starts further from the light source).
This image shows the effect of a light source that is too close to the tank surface.
For example, visualize yourself at home in the evening, sitting in your armchair reading the newspaper. There is only one light on in the room, a bare 30 watt lamp by your chair. If you look at your newspaper and the lamp is six inches from it, you can see your paper quite well. If you were to get up and walk two feet from the lamp (light source) the darkening (fall off) is quite severe. If you were to start at 2 feet away from your light source and walked another two feet away, the fall effect is still there but not as severe. This fall off effect is very obvious with flash photographs taken at indoor parties or at night with on camera flash units; whereas, fall off is unnoticeable to the human eye when the sun lights the scene.
To craft a well-lit scene with photographic light sources, the more room from the subject the better. This is one reason that most successful underwater photographs are taken of small areas or of specimens.
What we have been discussing in this section is the attempt to control a lot of variables. The good news is that there are a lot of tools built into most pro-sumer cameras to help us. The next section of this article will talk about the basics of using a camera and lighting.
Section 2: Basic Photographic And Photographic Lighting Techniques
Modern photography – both film and digital rely on a basic camera that has the ability to frame and focus (optical path), a light sensitive device (CCD, CMOS, film, other), and the ability to control the exposure that reaches (the light sensitive device) with a shutter and iris. These basic elements are responsible for making am image that is correctly exposed, properly focused, and framed the way the photographer intends.
The Optical System
The camera’s optical system (photographic lens) allows the operator to focus on a particular point in the scene and to control the amount of light reaching the light sensitive area. The lens length controls the scene view (wide or telephoto). A result of controlling the amount of light reaching the film or sensor also controls the amount of depth of field. Depth of field is the amount of scene information that is in focus from near to far. Depth of field is controlled by the camera’s optical systems “f-stop” (diameter of the iris in the camera lens). The more the iris of the lens is closed (higher f-stop) the more depth of field. Depth of field increases with the same f-stop as the focal point as the scene focus is moved closer to infinity.
Depth of field plays an important role in making good pictures. When the photographer opens the lens’ aperture, depth of field decreases. This can be very useful when the photographer wants the object in focus to be removed from the background; this technique is used in portrait, sports, and animal photography. This technique is not often used when photographing landscapes when you might want everything in focus. Depth of field using the same aperture decreases when the distance of the cameras film plane (light sensitive component of camera system) moves closer to the subject. For example, if I set my camera lens aperture to f8 and I am 5ft from a 1 foot diameter piece of live rock, the live rock takes up1/4 of my camera frame, the entire rock is in focus, but if I then move in to have a tight crop of the same animal using the same f stop, I discover that only half of the animal is in focus.
Note: Camera’s that have interchangeable lenses usually will have a depth of field scale etched onto the lens barrel. These markings are very useful for setting the f stop to get the needed depth of field.
Camera Shutter
The camera’s shutter controls the length of the exposure (the amount of time light is allowed to activate the light sensitive device). The camera shutter allows the photographer to stop action. If the subject matter is moving, a faster shutter can stop movement. Increased shutter speed is needed to stop action when the photographer is doing macro or telephoto photography. A faster shutter speed is also needed when the subject is moving perpendicular to the film plane.
Note A camera flash can also stop motion – the flash duration can exceed speeds of 1/10000 of a second – making the shutter speed of little of no significance, except for controlling ambient light (light emitted from the aquarium’s lamps). I recommend using the highest possible shutter speed on the camera to avoid ambient light contaminating the color of the scene by mixing light sources. The mercury lamps used in lighting fish tanks may provide fine light for the animals; however, this light source is not ideal for color matching functions (the ability to render accurate color). See charts from R.W.G. Hunt’s book “Measuring Color” third addition.
Lighting Techniques
Lighting a scene is a subjective endeavor. The photographer should pre- visualize how the scene should look and do his/her best to analyze how lights can be used to achieve this goal. The photographer also must know that the camera renders light very differently from our eyes. The human eye can see more tonality, subtle colors, and more nuances than the camera. So if a scene looks good to our naked eye, it may not look good to the camera. Unfortunately, it takes experience to recognize how your camera will respond to a given light source(s).
Lighting terminology
- Photographic Light Source
- Any device that illuminates for the purpose of photography. For example, the sun, flash units, candles, tungsten, infrared, ultraviolet, tungsten, etc.
- Key Light
- Main light source
- Hard light
- Non Diffused light, e.g., the mid day sun, a flash unit that is built into or attached to a camera with no diffusion.

This is example of key lighting
- Diffused Light
- A light source that has diffusion material between it and the subject. For example, on a cloudy day the clouds act as a diffuser for the hard sunlight.
- Fill Light
- Usually a soft light that is used to offset the high contrast of key lighting. This light offers light fill for the darker areas in the scene.
- Ambient Light
- The existing light in a scene that exists before adding another light source.
- Mixed Light
- The mixing of two different light sources. For example, daylight mixed with tungsten light.
- Light Modification Device
- Any material or implement that is used to diffuse, shape, limit, change the properties of a light source: e.g., diffusion materials, umbrellas, filters, etc.
- Color Temperature
- The color of light in Kelvin. This is determined by heating carbon to a degree Kelvin, and the color of that carbon would be the color of the light source: The color of tungsten light is approximately 3200 degrees Kelvin. If you heated carbon to this temperature the carbon would appear yellow orange.

One basic lighting technique is to implement a key (main) and a fill light. If one were to imagine an overhead light source — like mid day sun — shining through the top of your tank, you would notice the scene would look pretty realistic. However, when you shoot this natural looking scene with your camera, it will probably show too much contrast, which occurs because the camera doesn’t have a tonal reproduction system as good as one’s eyes. To alleviate this problem, the photographer can reduce contrast (get more detail in the shadows) by using a fill light.
This is an example of key and fill lighting
Hint: I like to start off lighting a scene or specimen with one light source, then add and modify the light(s) as I need to. I always try to pre- visualize (what I want the scene to look like) before I unpack and set up the light(s). I tend to like scenes to look natural, and always think about how the sun or man made light sources illuminate our world, whether it is cloudy, sunset, window light, candle light, etc. If you light your scene with the same technique as a mug shot, the scene will have that look.
Techniques For Photographing An Area Of Your Tank
When I photograph a scene of home aquaria, my approach to lighting would be to pre-visualize a shallow reef on a sunny day. I imagine the sun lighting the animals and plants from above. The lighting would be generalized; this would be my starting point. A decent generalized light for this scenario would be a large overhead fill light. If certain animals did not look photographically resolved I would start tweaking other key lights to enhance what looked wrong. This type of analysis works pretty well when the photographer is trying to show more than one specimen or a scene in their tank.
Techniques For Photographing Individual Specimens In Your Tank
When I am photographing a single specimen, I analyze my lighting approach differently. The technique here is almost opposite of photographing large areas. I would look at the attributes of the specimen and start making lighting decisions. I would start with a diffused key light on the specimen and add soft fill light as needed. Usually photographing single specimens is simpler than a larger scene, with a larger scene, there are more components to balance.
Section 3: Digital Photography
Digital photography has the same basic challenges as film. The photographer must still be able to frame and light the scene. Digital photography is actually much more complicated than film photography. Once you leave the consumer or prosumer line of cameras and are facing making color management (camera calibration, rendering intent, and output) choices, the photographer is now an acting lab technician. The latter provides the photographer with a phenomenal amount of control, although this might not be ideal for most users.
Types of Digital Cameras
There are only a few basic digital camera designs:
Full array with Bayer mosaic color filter
The most common is the full sensor array with a Bayer color mosaic filter glued on top of the sensor to provide interpolated color. The Kodak scientist Bryce Bayer invented this color interpolation system. Utilizing the Bayer filter pattern, 50% of the pixels are green, 25% are red and 25% are blue. More pixels are given to the green pixel because the human eye gets most of its sharpness information from green light. This design allows the photographer the capability to have a compact camera with pretty high resolution, and most importantly a single exposure is needed to get an image. The down side to this system is that color is interpolated, resulting in color aliasing; since there is a mosaic filter on the sensor, one does not get the full resolution of the sensor (present algorithms enable about 80% of the sensor’s full resolution). This is the most common imaging design to date.
Full array with filter wheel
This device incorporates a full array CCD, and a set of RGB filters to make three separate exposures through. This system has much better image quality than the Bayer filter system, but makes the photographer take three exposures to produce a color picture.
Linear Arrays
Linear arrays use a single row of pixels that scan across the image, making three separate exposures—one for each of the red/green/blue (RGB) filters. Linear arrays possess the capability to deliver high-resolution images, have the disadvantage of require a continuous light source and a subject that does not move.
Tri-Linear Sensor
In the tri-linear sensor, three parallel linear CCD elements are separately coated with RGB filters. When the colored image is captured, it is built up line-by-line allowing for full color image capture. Tri-linear CCD sensors are used in high-end digital cameras to give the highest resolution, and are used for high quality reproductions. This design has a distinct advantage over the linear array when making a color image, requiring only one pass. The Tri- Linear array system has the disadvantage of requiring a continuous light source and a subject that does not move.
Note: If you are using a single shot color camera, chances are you are using a Bayer color mosaic filter system. If this camera claims to have 6 mega pixels, twenty to forty percent of the sensor’s resolution is lost to achieve color.
Color
For most users, I would recommend using the cameras default color characteristics; the engineers that designed the color response of the cameras do a heroic job of getting excellent color under a wide variety of light sources. They also make sure that the RGB files these cameras create are compatible with most offset press through home printers. The manufacturers of most digital cameras have calibrated their cameras to enable transformations into sRGB color space in the camera’s firmware. Although sRGB has some color limitations, if the photographer does not know what he/she is doing, the camera, as an engineer once told me, can yield unexpected results. If the digital photographer is imaging consistently with one or two light sources, and is looking to get extremely accurate color, I would recommend using color management tools. The moral of this story is to let the camera due its work, unless the work it is doing is inadequate.
Managing Your Images
Now that you have created all of these beautiful pictures, you need a mechanism to retrieve them for future use. The long-term management of digital assets is very difficult, and the preservation of these digital assets has no proof of concept yet. The good news is that many government institutions are taking this very seriously and are committed to saving digitized objects in its collections. The bad news is that it is time consuming and can be very expensive. I am not recommending that one manage pictures like the library of congress, large university, or museum. Digital assets have the handicap of needing the correct technologies (software and hardware) to access them. With film or photographic paper, all you need is a light source to see your image.
The three main things to keep in mind when archiving and managing your images:
- Archive medium
- Image File Format
- Finding Aid
Archive Medium
Data CDs or DVDs are probably the most reliable archive medium to date for images. They are read on almost any personal computer.
Image File Format
Probably the best format to store an image in is an uncompressed Tagged Image File Format (TIFF) file. This file format is an international standard and is sure to be maintained for years to come. The Joint Photographer Engineering Group (JPEG) is a compressed file format that is also an international standard that will also be maintained. The only downside to JPEG is that its compression algorithm works by compressing image data. Even though there is image loss, the user usually cannot see this unless the compression ratio is set very high. The benefit of compressed files is size: a six megapixel 24 bit per channel RGB tiff file is 18 megabytes, where as a low compression ratio jpeg is going to probably end up between 4-8 megabytes. The compression efficiency of jpeg is dependent on the complexity of the scene; for example, if your scene is only one pure color the compression works very efficiently, if your scene is very complex the compression is less efficient.
For more information about the TIFF and JPEG format check:
- JPEG: www.jpeg.org
- TIFF: www.adobe.com or www.libtiff.org
Finding Aid
Dublin Core simple is a pretty straightforward scheme with regard to locating your digital assets. The website http://dublincore.org/documents/usageguide/#coreelements has the basic elements to retrieve your images plus some extra stuff you probably will never use. I would recommend looking at these elements to choose the ones you feel are essential, add ones you need (e.g. archive disk) and ditch the rest. I use this system myself and it works well. I would recommend creating an ASCII excel tab delimited spreadsheet to manage your images, if you do not need to create a full-fledged relational database.
Web Resources
How digital cameras work:
Color Demos
- “The Physics of Light and Color”

0 Comments